14 Jul Backing Up To Microsoft Azure Using BackupAssist
It’s been a couple of months since we announced the launch of BackupAssist v10 and its super efficient new cloud backup engine. The significance of the new engine is that it unlocks the possibility of using public cloud giants AWS and Azure as backup destination options.
While the BackupAssist side of things is typically easy to configure, I’ve had a few requests for help navigating Azure’s configuration options, so in this article, I’ll be walking through the steps as they are today.
Before we look at the BackupAssist configuration, we need to start by looking at what’s required in Azure. If you haven’t already got a Microsoft Azure account, now is the time to set one up.
This process is likely to change so instead of trying to record all those steps, first have a look here to get your account up and running.
https://azure.microsoft.com/en-us/
Creating the Azure Storage account
Once you’ve registered an Azure account and are logged in to the Azure portal, you can begin to create a storage container account that you will use to store your backups. We recommend you use a separate storage container for every BackupAssist site, to help control access.
We recommend you use a separate storage container for every BackupAssist site to help better control access.
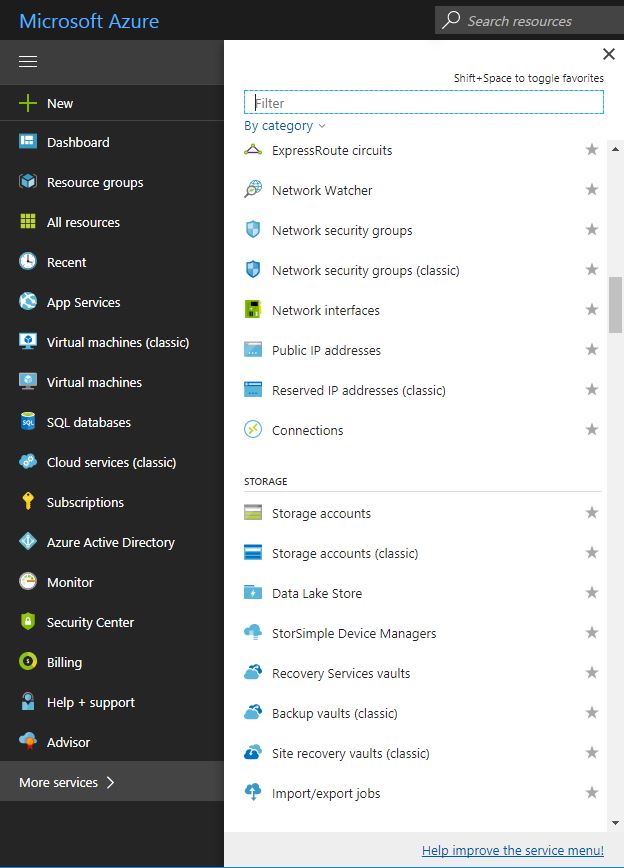
Step 1
First, we need to look for the ‘Storage accounts’ service. You should find this under ‘More services’ in the left-hand menu.
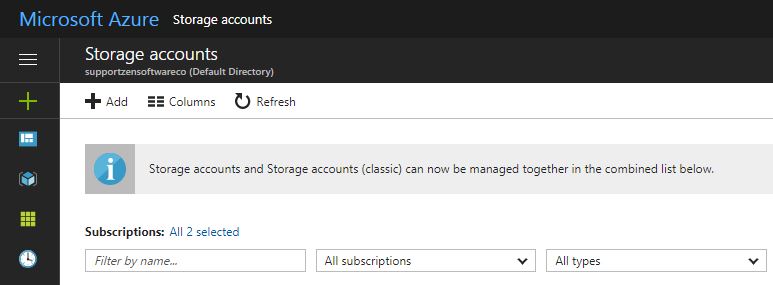
Step 2
Within the ‘Storage accounts’ section, choose the ‘Add’ icon at the top to create a new storage account.
Step 3
This will open to give you the ‘Create storage Account’ options.
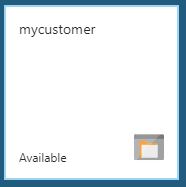
First, let’s give this new storage account a name. It has to be something unique and linked to the BackupAssist job. For example, let’s use ‘mycustomer’ (lowercase letters and numbers only). For the remaining options see the list
For the remaining options see the example below.

Deployment Model: Resource Manager
Account Kind: Blob Storage
Performance: Standard
Replication: RA-GRS
Access tier : Cool
Storage service encryption: Disabled (BackupAssist will encrypt all data for us)
Secure transfer required: Disabled (BackupAssist will encrypt data transfer)
Subscription: Pay-As-You-Go or any pre-paid subscription you have setup with Azure
Resource Group: Create a group, eg ‘Site1-Backups’
Location: Choose where you would like to store your data e.g. ‘UK South’ or ‘UK West’
Select ‘Pin to dashboard’, and then ‘Create’ to continue
Step 4
Your storage account should now be being deployed and after a short time you should have a shortcut pinned to your Azure dashboard
Step 5
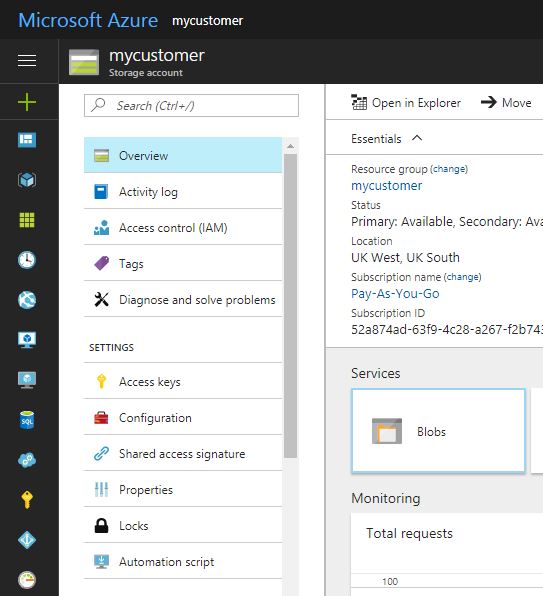
Double click on your newly created storage account to view its settings.
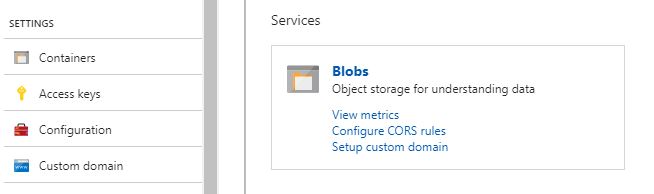
We now need to locate the access keys used to connect to this specific storage account.
You will find the ‘Access keys’ section under ‘Settings” in the left-hand menu.
In this section, you’ll find two sets of access keys that can be used.
We only need one set so we’ll simply copy ‘key1’ using the copy button next to it.
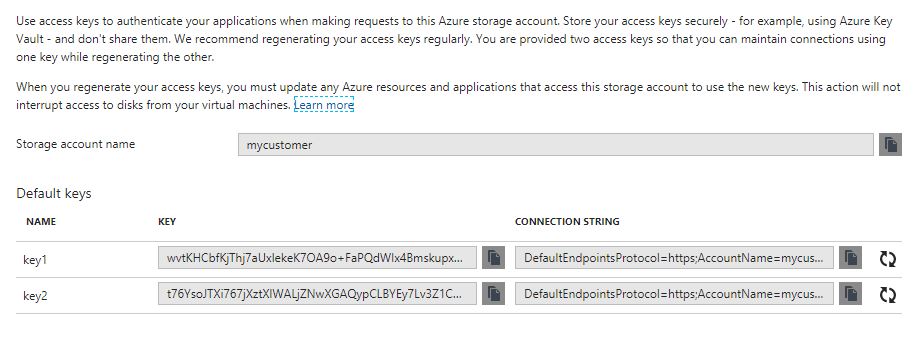
We are all done for now with the Azure interface.
Step 6
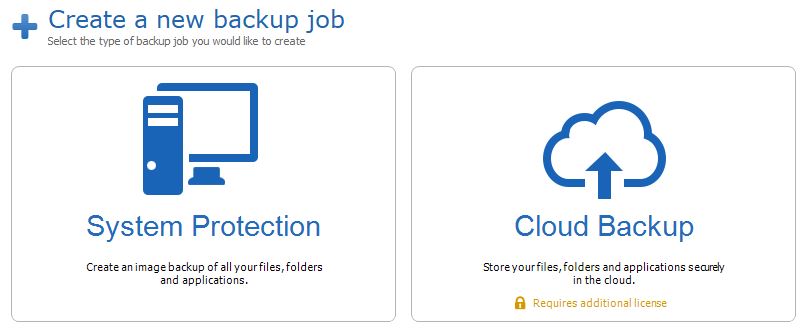
Turning to BackupAssist, we can now set up a new job from the ‘Create a new backup job’ section.
Then we’ll choose ‘Cloud Backup’.
We are now simply running through a new backup job wizard, so after selecting the data you’d like to backup, choose the ‘Azure’ destination.
Select a backup scheme and hit ‘next’ to enter the Azure container settings.
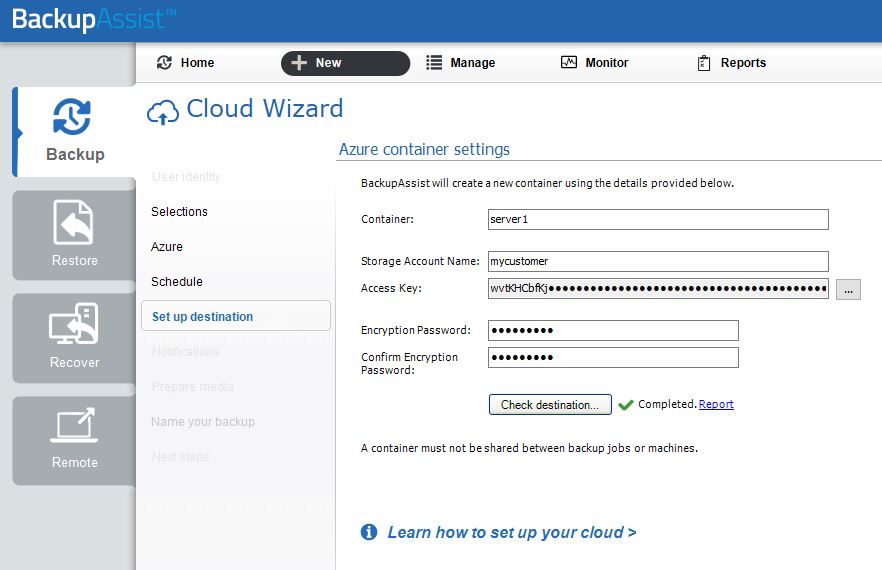
- The container name can be anything you like, I recommend you pick a name that is relevant to the server and job name.
- Enter the ‘Storage Account Name’ and paste the access key you copied earlier. (please note you have to select the ‘…’ button to enter the key)
- The encryption password is a new password only you will know and you will need this when restoring so don’t forget it (we always recommend you use a password manager like 1password to create and store a strong password )
- Click on ‘Check destination’ to confirm the settings.
- Click ‘Next’, name your job and then choose ‘Finish’.
- Your job should now be complete and ready to run!
Step 7
If you want to see what data has been created in this Azure storage account you can select the ‘Blobs’ link.
To view the contents simple drill down into it to see the BackupAssist encrypted chunk files.

So that’s it for Azure setup – if you’re struggling or just want to discuss some of the options available to you, by all means, get in touch in the usual ways, or via the comments section below.