21 Feb How to back up Microsoft Hyper-V servers using BackupAssist
One of the key benefits of using BackupAssist in a Hyper-V environment is that only one licence is required on the physical host server in order to perform file level backups across all of the guest machines.
In this post I’m going to step through a Hyper-V scenario I come across quite frequently, and show you how to configure a single backup job to provide the following:
- Bare metal backup
- Recovery of a guest machine in its entirety
- Recovery of files from a guest
- Exchange mailboxes and near-continuous SQL backup
For this scenario the following set of licences must be purchased for one installation of BackupAssist on the Hyper-V host server.
1 x BackupAssist with Upgrade Protection
1 X Hyper-V Granular Restore Console
1 x Exchange Mailbox add-on
1 x SQL add-on
Scenario 1 – Server configuration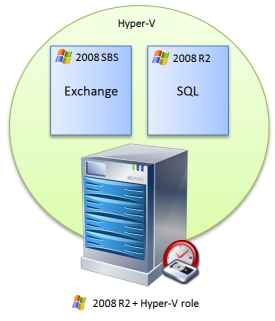
In this example I’ll be backing up a single 2008 Hyper-V server running two 2008 guests.
VM 1 – 2008 SBS including Exchange
VM 2 – 2008 Server R2 with SQL
The host machine has two internal SATA hard drives configured in the following way:

Disk 0
100MB System Reserved Partition
59GB C: Windows System drive
175GB D: Temporary storage
Disk 1
231GB E: Hyper-V guests
I’ll be storing my backups on a pair of external USB hard drives, one of which I’ll take off-site with me every day. This will show up as the G: drive and I’ve labelled them ‘Daily 1’ and ‘Daily 2’.
Job 1 – Bare metal backup
I’m going to begin by installing BackupAssist on the host machine and configuring a single Windows imaging job to take a full, bare metal backup including both physical hard drives and their partitions.
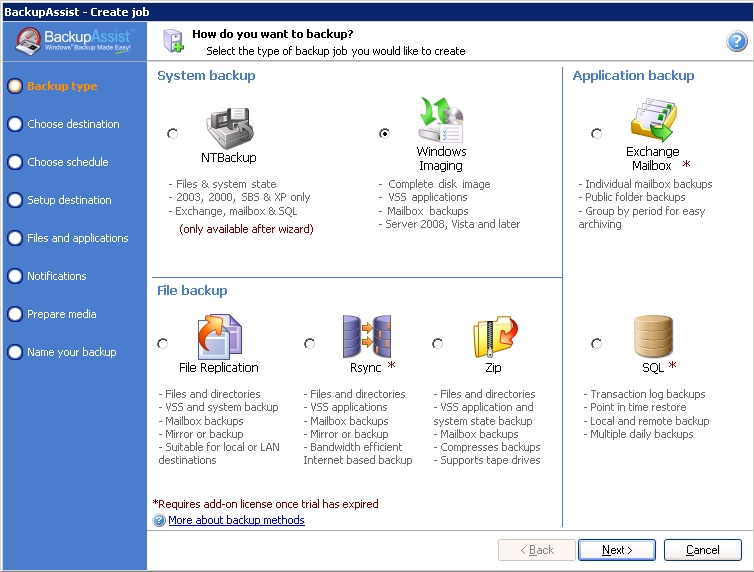
To set up this job, from the initial wizard simply follow these steps:-
Step 1 – Choose Windows imaging and click next
Step 2 – Select external hard drive and click next
Step 3 – Select a backup scheme (I went for daily rotation) and choose to back up multiple times daily, then click next
Step 4 – Choose the drive letter of the external hard drive G: in our example and select two disks for the backup, click next
Step 5 – Select system volumes (for bare metal recovery) and click next
Step6 – Select the Windows system partition (C:), and the system reserved partition. Also select the ‘Microsoft Hyper-V VSS’ root folder to automatically include all Hyper-V guest files
Step 7 – If you wish an email report to be sent, enable this option and choose a valid email recipient, then click next
Step 8 – At this point you should prepare both drives by connecting them one by one and choosing the relevant ‘prepare’ button. You can change the names of these drives if you wish. Once the drives have been prepared, choose next
Step 9 – Name the Job ‘Bare Metal Backup with Hyper-V’ and choose finish
Please note –
I’m running this job multiple times a day (the default is every 3 hours between 6am and 6pm). Because the destination is a local drive, after the initial image backup, each successive backup is comparing the disc sectors that have changed and recording the differences. On our test server this takes approximately an hour on average to update the image.
Now, should either of the internal SATA drives fail in the server, this image backup can be used to recover the whole system to a working state using any of the recovery points.
When the destination device fills up, the oldest recovery point is deleted automatically. With a destination drive that is around twice the capacity of the source drives being backed up, you should expect about 30 days of backups; with two drives this is doubled.
Jobs 2 and 3 – Restoring whole guests and individual files
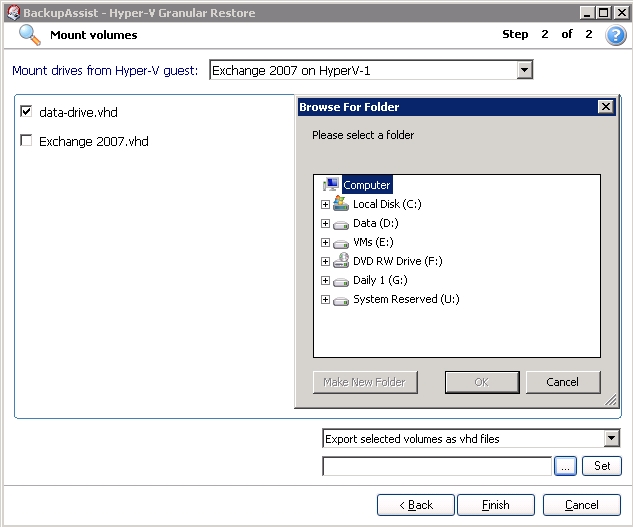
By using the Hyper-V Granular Restore Console it’s possible to delve further into your image backup to retrieve more specific data.
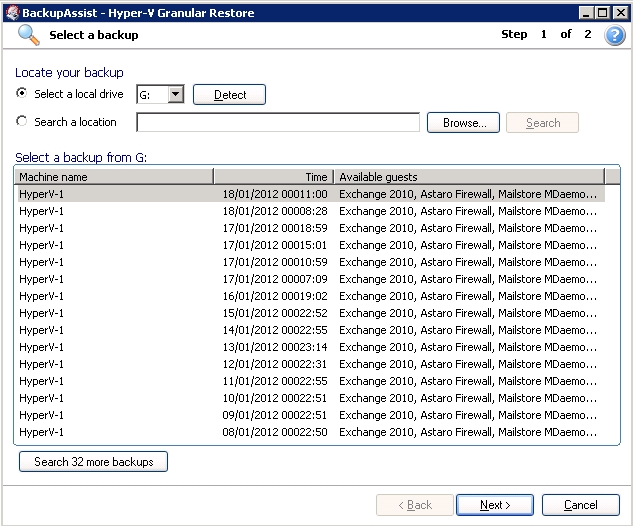
The Hyper-V recovery console allows you to restore either a specific guest machine from an image backup, or alternatively mount a virtual hard drive to the host server which provides you with the ability to retrieve specific files from your guest VMs.
This is particularly useful on those occasions where users delete file in error, as restoring a copy is as simple as browsing the history of the image backups taken, mounting that backup as a local drive letter and copying the files as required.
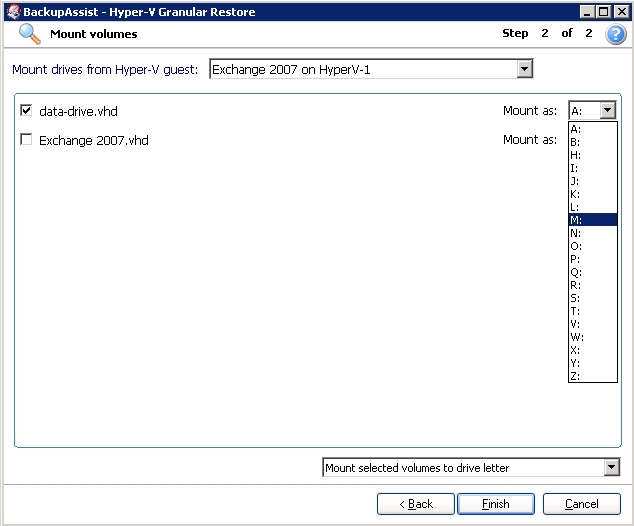
Likewise, if you need to restore a guest machine in its entirety, it’s just a case of recovering the relevant VHD files to either the same Hyper-V machine, or a share on another server running Hyper-V.
4. Exchange mailboxes and near continuous SQL backup
In the example above I mentioned I’ve got MS Exchange on one of the VM’s and SQL on the other, so I’m now going to add backup jobs to take care of a second level backup of this data specifically.
 The Exchange mailbox add-on
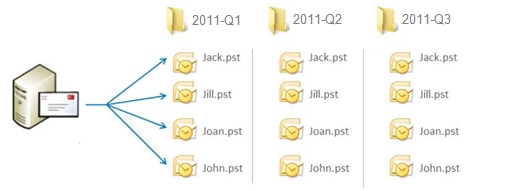
So far, I’ve got a full backup of the Exchange server as part of the image backup and if I need to I can restore the whole Exchange database by restoring the database file in its entirety. If I want the ability to restore individual mailboxes or indeed even individual emails, I’ll need to use the Exchange Mailbox add in and create a new Exchange mailbox job.
 Please note, the Exchange mailbox licence is a chargeable add-on. Pricing available here.
As I’m running this Exchange Mailbox job from the host machine and not the guest VM where Exchange resides, I need to consider which Windows user the job will run as, and specifically what rights it has on the server that’s running Exchange.
Host and guest machines not on the same domain?
A lot of the customers I talk to choose not to have the host and guest machines on the same Windows domain. In this scenario you’d need to create a local Windows user on the Hyper-V server with credentials that match a user on the domain that’s an Exchange “Admin” account.
For further details please follow this guide on configuring the Exchange mailbox job:
http://www.zensoftware.co.uk/kb/Article.aspx?id=10430&cNode=0E6M4T
The mailbox job will be configured to store the PST files the add-on creates, on the data drive partition (D:). If required we can also include this drive as part of the image job we created earlier to provide an additional off-site backup element to the solution. Alternatively, the PST files can be stored directly on to an external USB harddrive indeed any other BackupAssist supported destination.
 The SQL Add-on
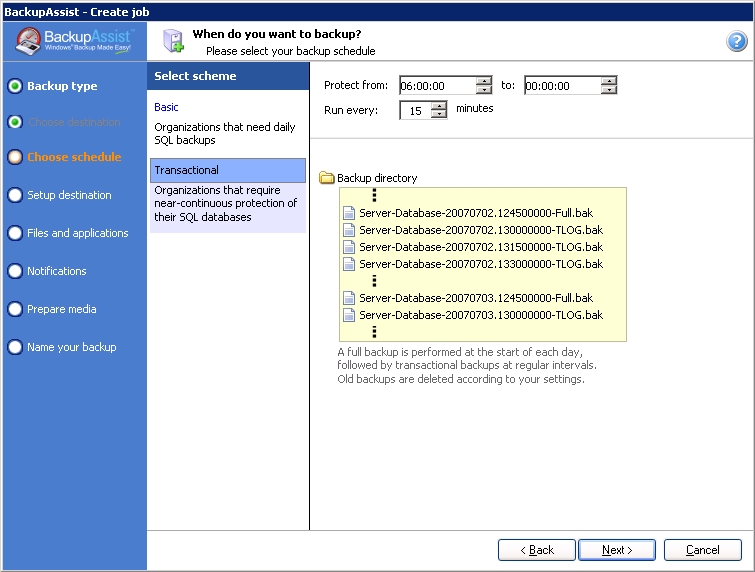
As this database sees lots of changes, a daily image job wouldn’t provide sufficient protection so I’m using the SQL add-on as it gives me near continuous backup for the instance of SQL running on the second guest machine on our Hyper-V server.
In this instance I recommend setting up a separate SQL server job on the Hyper-V host which will connect over the virtual network to the SQL instance on the guest. This then backs up the database daily and the transactional logs every 15 minutes. With this level of backup the database can be restored to any specific transaction in time should the need arise.
Again, if the host machine isn’t a member of the same Active Directory domain as the SQL server it may be necessary to create a new local Windows user on the host. This user’s credentials will need to match another within the same Active Directory domain as the SQL server, so that when this job runs it has permissions to connect to the SQL management service. In BackupAssist you’ll need to configure the BackupAssist user identity under the main settings window to run all jobs as that specific windows user.

