21 Mar Amazon Lightsail – Removing The Last Barrier Between Your Small Business and The Cloud?
Using cloud service providers to replace on-premise servers isn’t a new thing.
In recent years the big players, Microsoft, Google and Amazon have grown their services to the point that they are all incredibly powerful but they can also become quite complex, making them daunting for the less technical user.
In this post, I introduce Amazon Lightsail, a product that makes it much easier to get your first cloud-hosted server up and running and replace that old creaky on-premise server.
Why would you want to move your server into the cloud?
Not all businesses should move away from on-premise servers, however the reasons some companies choose to make the switch include:
- Reduces the time and money spent on networking hardware
- Avoids unpredictable hardware refresh spikes
- Better protection from fire, theft, accidental damage
- More resilience – redundant power, cooling and offsite backup
- Reduce bandwidth requirements of remote workers
- Ability to scale, paying only for what you need
What is Amazon Lightsail?
Lightsail is an Amazon virtual server hosting product, focused on simplifying the steps needed to build and run a cloud-based virtual server.
In this post I’ll show you how to use Windows 2016 server image.
Once set up, the server runs just like any other standalone Windows server, but with its own Public IP address that you connect to over Remote Desktop Protocol to further install the software you wish to run.
This makes it an ideal platform to archive email for Office 365 using MailStore Server, or to run your own MDaemon Mail Server which need to be available 24/7, but don’t necessarily have to be located within your own office network.
Running your servers in the cloud like this is an ideal way to minimise the cost and complexity of your on-premise network components, and makes remote working or home working easy as all clients work in exactly the same way.
What’s involved in spinning up my own Lightsail server?
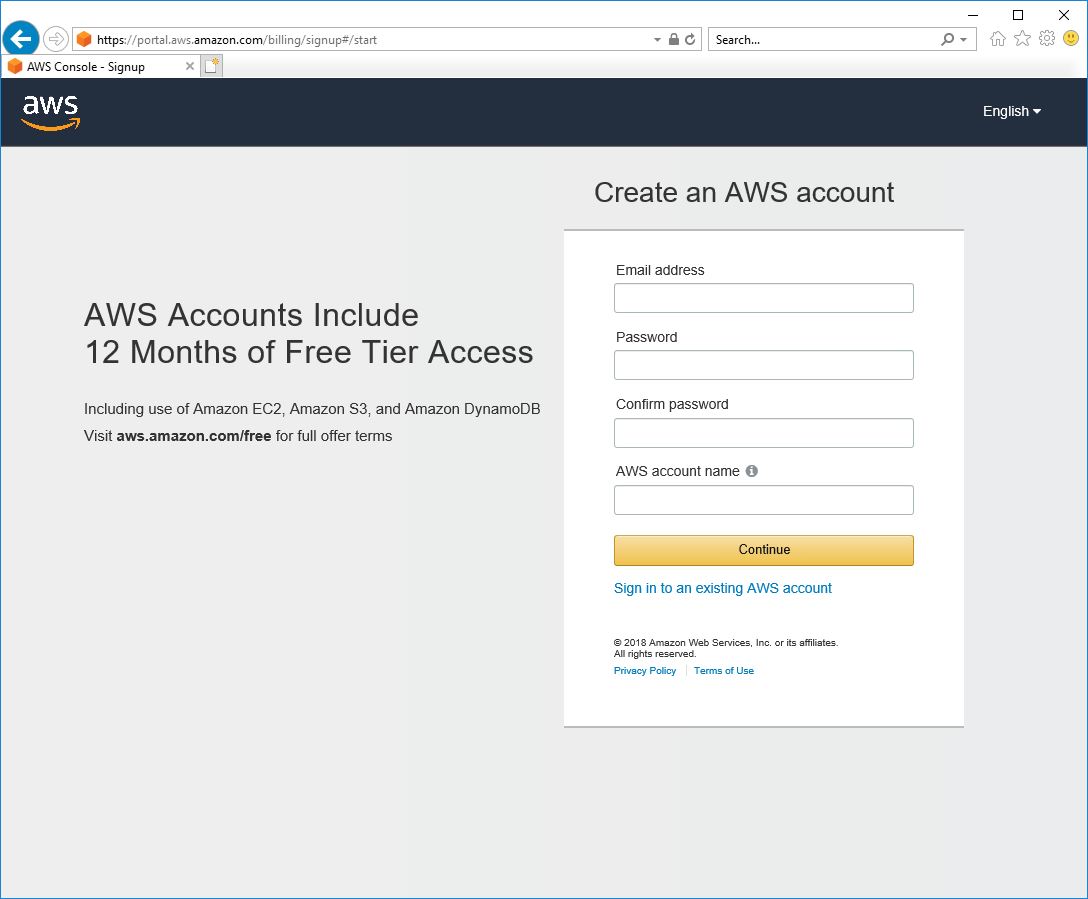
Create an Amazon Account
Before you can use any Amazon AWS services the very first step is to create an account with Amazon. This account is referred to as the root account and will have full access to set up and use all Amazon AWS services.
It’s worth noting that all new AWS accounts come provided with many free tier services as a bonus but you will be required to enter credit card details in order to set up an account.
To start the process of creating an account visit the following link and run through the setup wizard.
https://portal.aws.amazon.com/billing/signup#/start
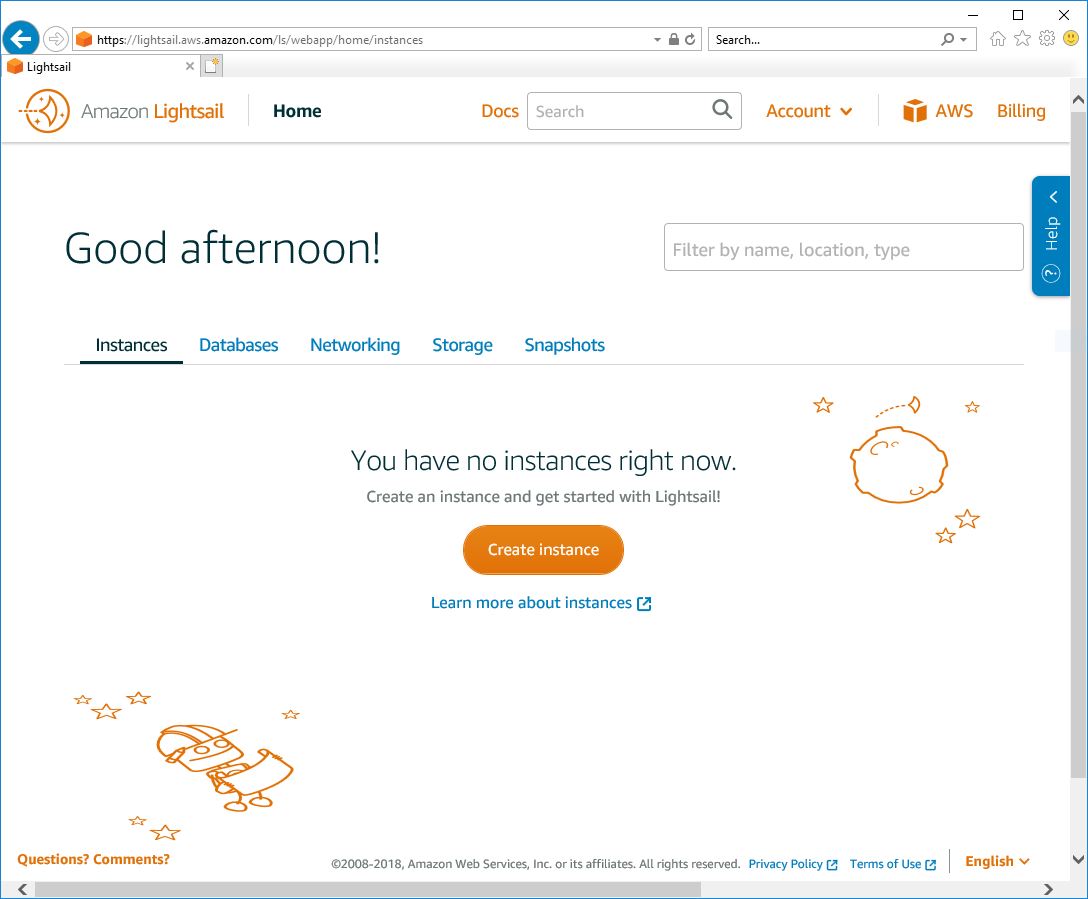
Choosing and building your first Lightsail instance
Once you have created your AWS account you can now navigate over to the lightsail product page to begin setting up your first server instance.
From the main page, the options presented are kept very simple. In this guide, we will click on the large ‘Create instance’ button to start the wizard
Once you’re within the setup wizard, it’s now a simple case of choosing the relevant option for the instance.
To start with you should select a location to host the instance ‘London, Zone A‘ in our example.
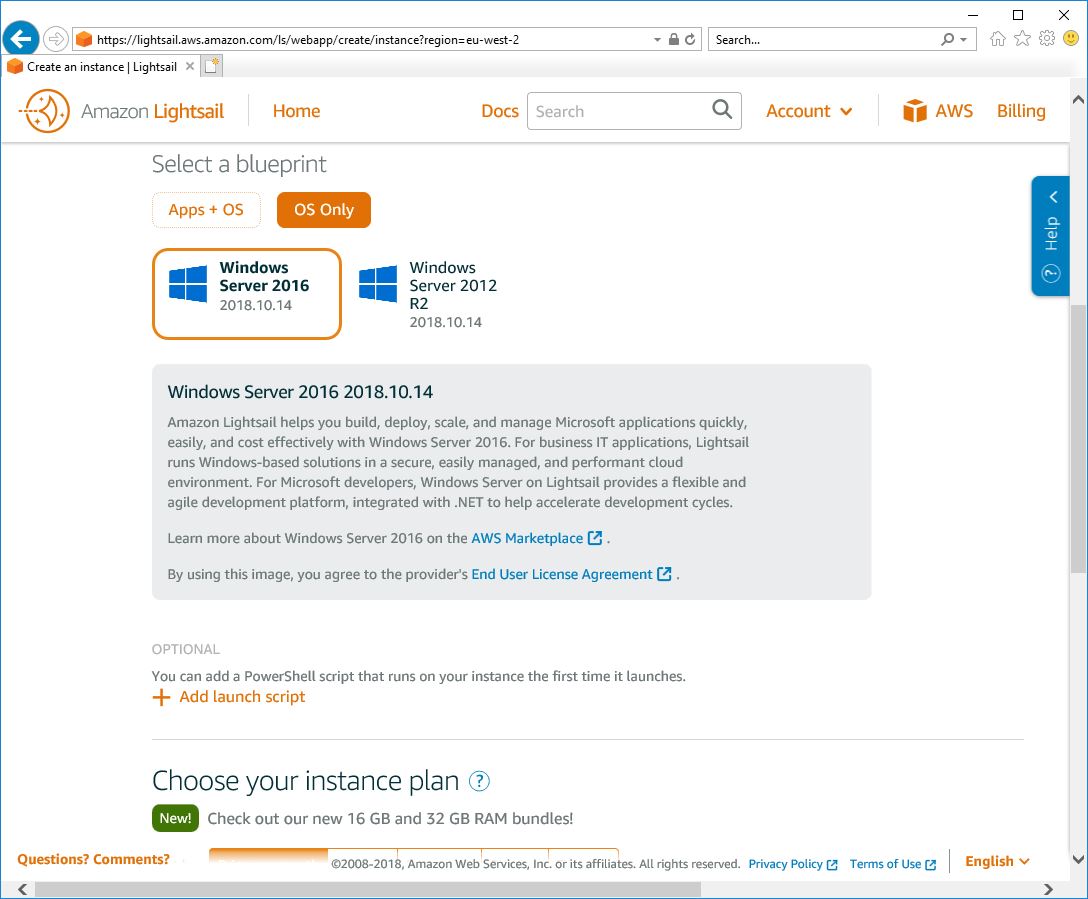
Next, we need to choose the platform, and we’ll choose ‘Windows‘.
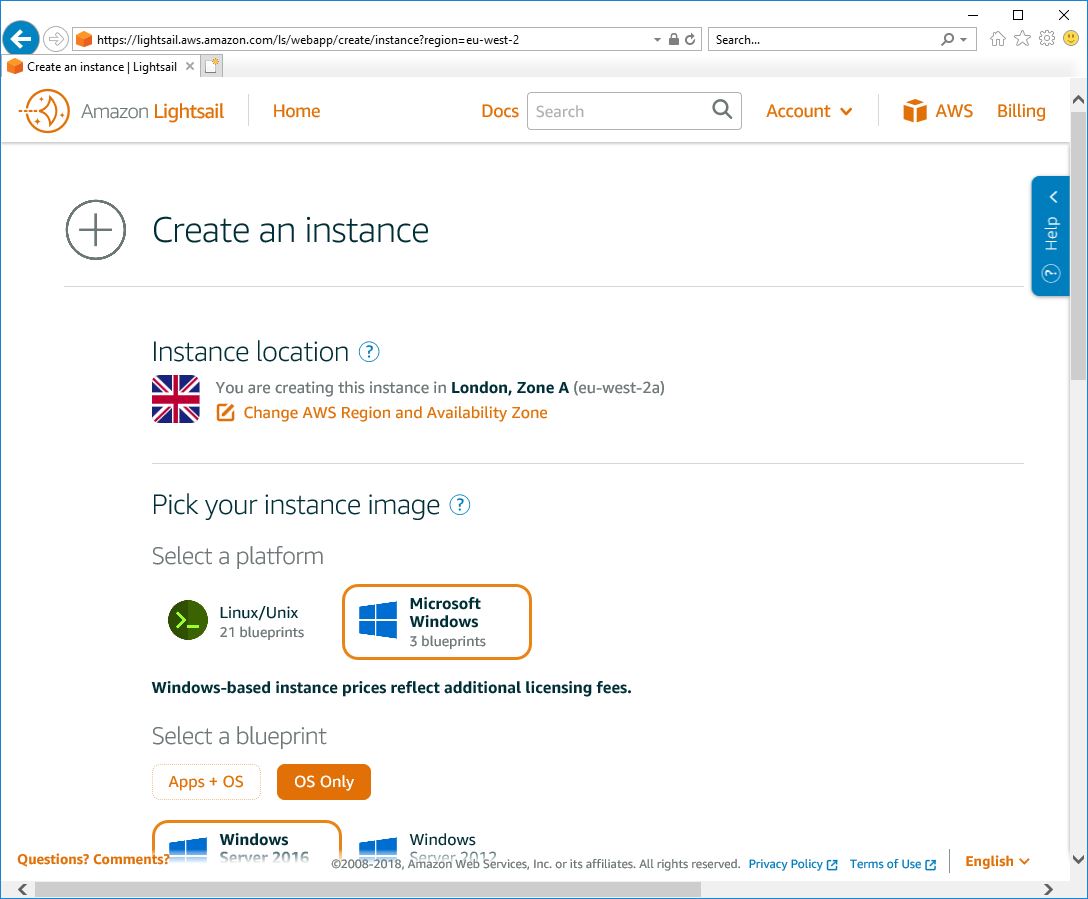
Scrolling down further we can now choose which Windows O/S we wish to use.
In this example we will be using the latest ‘Server 2016‘ image.
Scrolling down even further we’ll choose an ‘Instance Plan‘.
By default, the plans are ordered by price per month but you can also organise them by memory, processing power, storage or data transfer if you prefer.
For our example, we will be choosing a Plan that is suitable for hosting an MDaemon server for up to around 50 users.
With that in mind, we’ve have picked the $20 USD per month option.
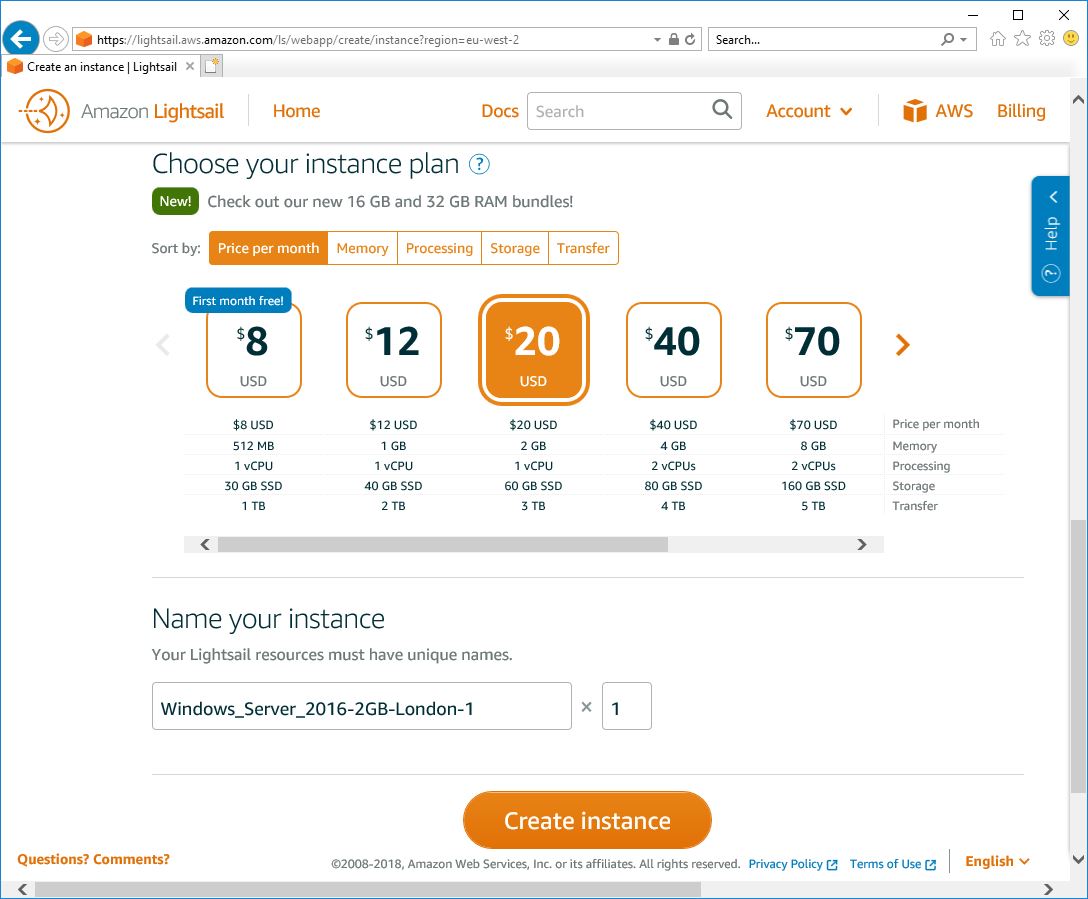
The final stage is to name the server and click on the ‘Create Instance‘ button, to go live.
This will start the instance and you will see it in ‘Pending’ status.
You can click on the instance to administrate it.
This shows you all of the settings for the Instance and importantly the public IP address and connection details.
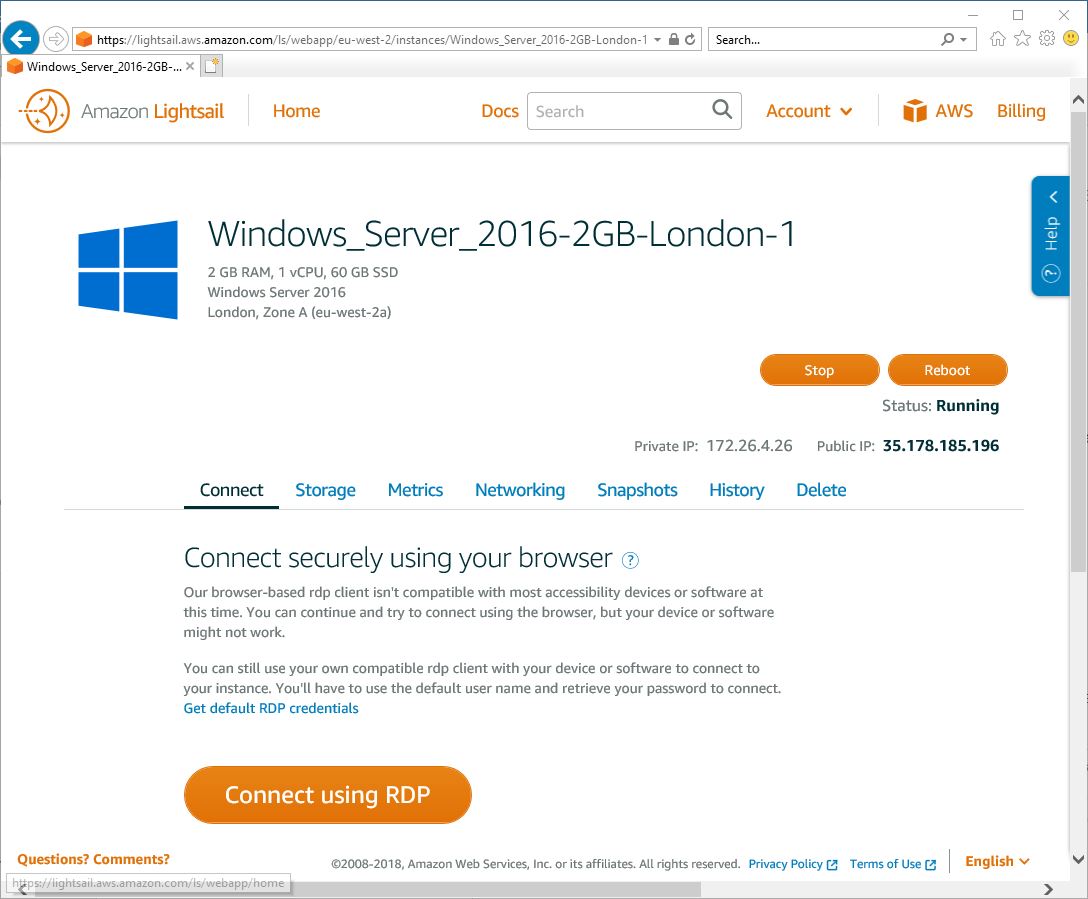
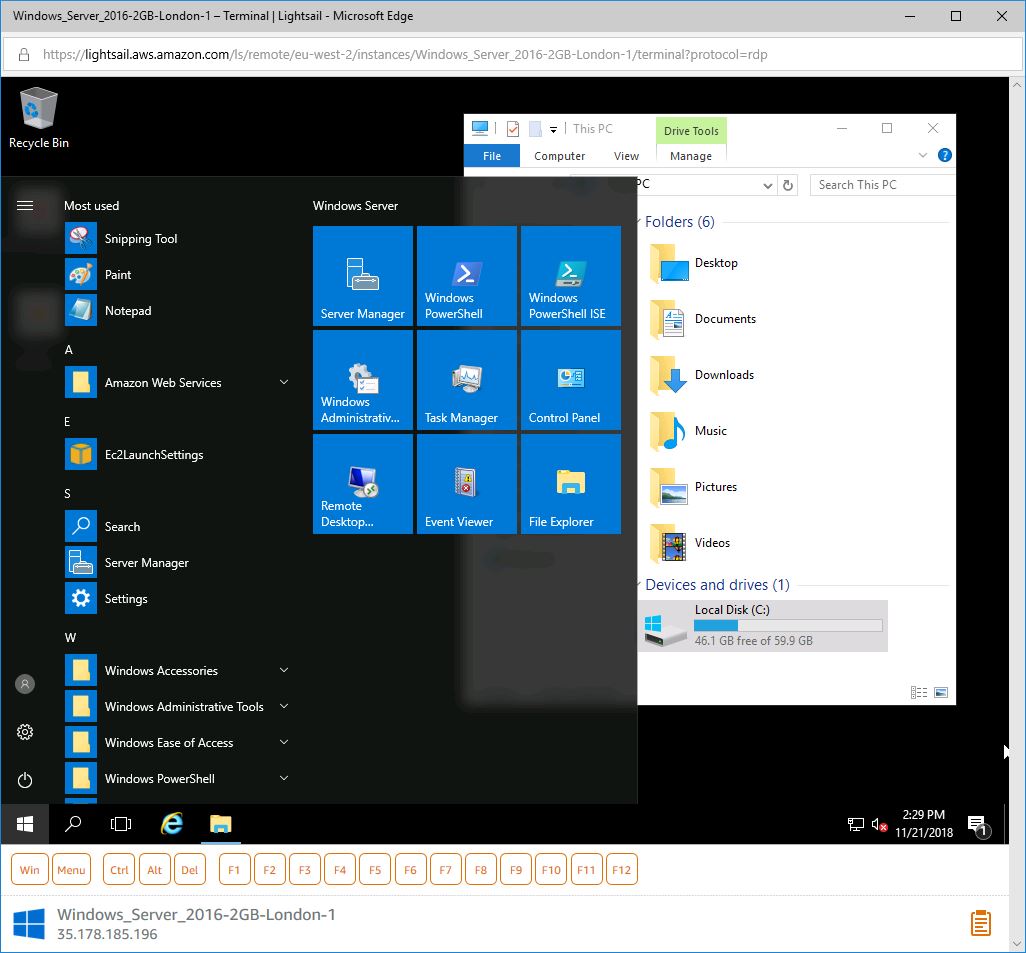
After a few minutes, you should be able to click on the password for the default ‘Administrator’ user and either connect using Remote Desktop Protocol or connect using the web-based RDP client provided.
Fixing your Public IP address
Before you continue to work on accessing the instance remotely we recommend that you fix the Instances IP address. By default all instances are assigned a Public IP address however this IP address will change when the instance is rebooted. Not ideal for any public accessible servers such as an MDaemon email server!
Within the main lightsail ‘Home’ menu select the ‘Networking’ section and create a Static IP.
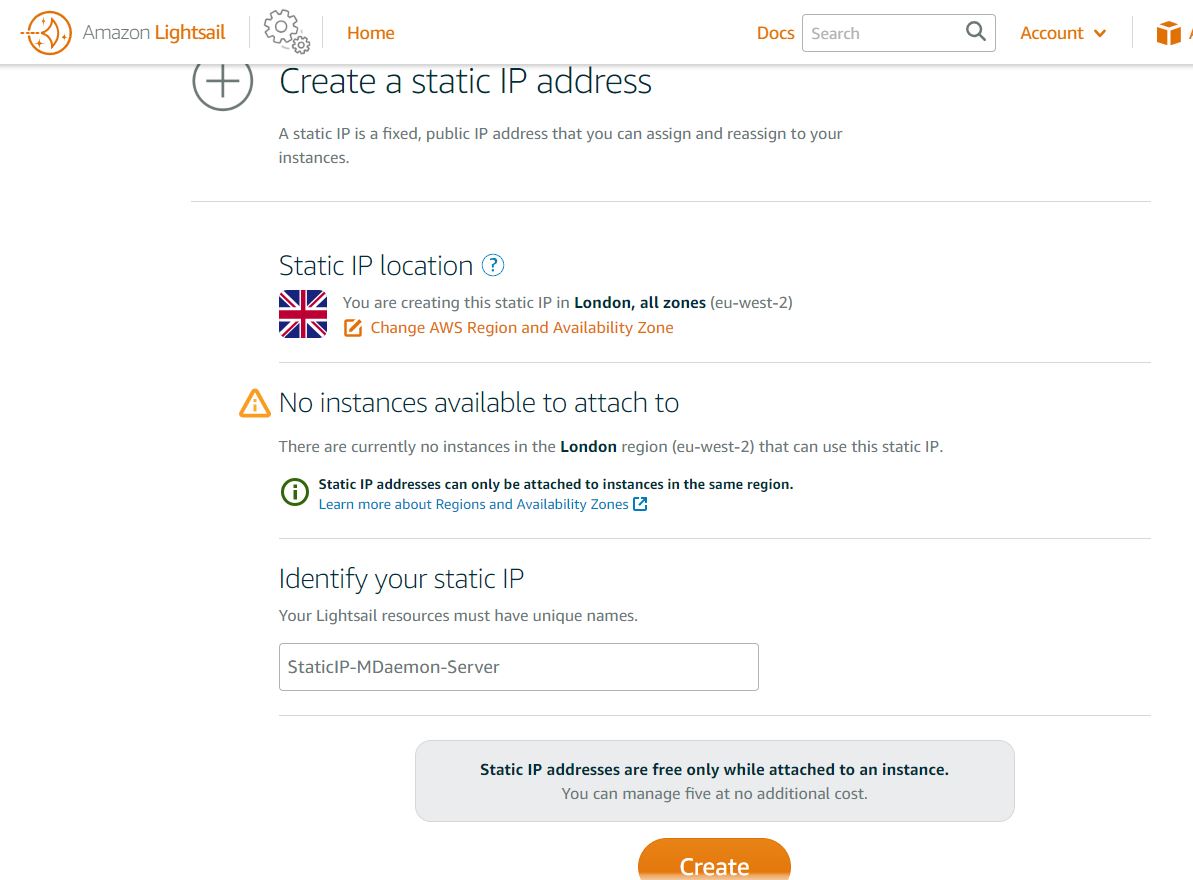
Then attach this newly created static IP to your recently created Instance.
Controlling access to the Instance
Now the instance is running on the correct Static IP address its a good time to look at the firewall section to define basic Firewall rules to control access this is under the instances own ‘Networking’ section.
In the case of mail services like MDaemon or SecurityGateway, these will require that multiple TCP ports are made available to the outside world.
Each Lightsail instance has a basic IP firewall applied to it which can be configured
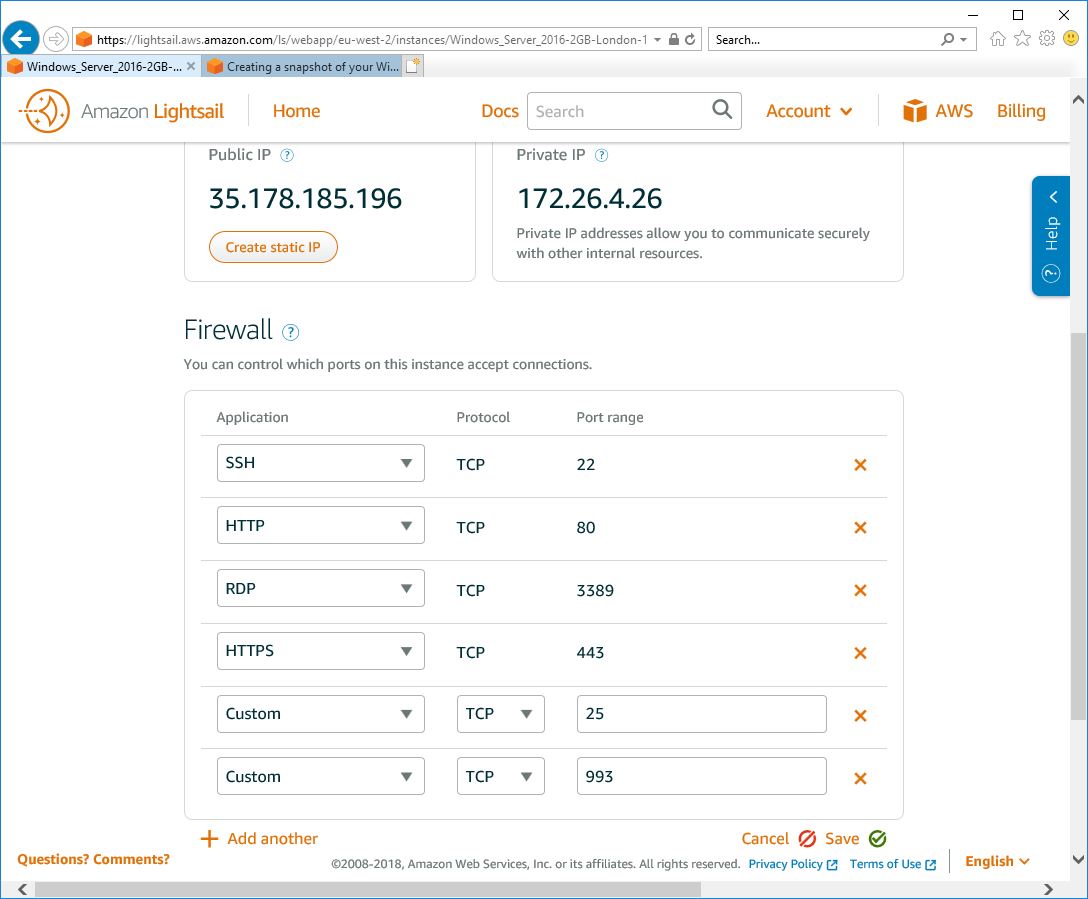
Here you can open up specific ports to be accessible publicly.
Unfortunately, there is no option to define the source IP address or ranges that can access the port. If you do require access to be limited to specific IP ranges then this will need to be configured within the windows firewall on the instance itself.
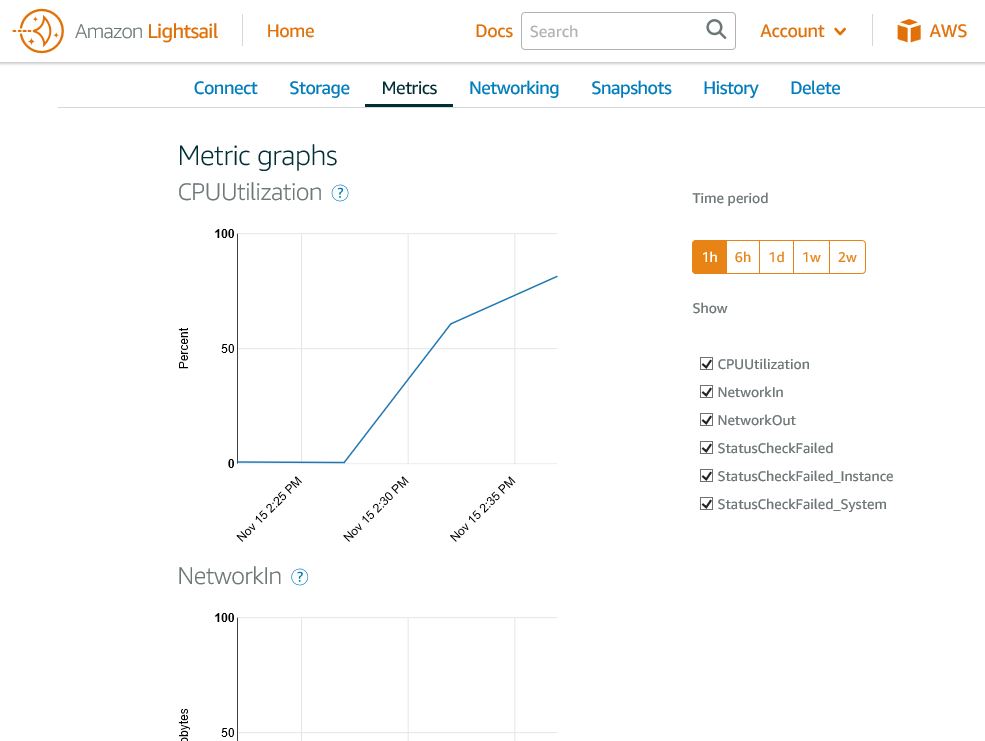
Monitoring instance load
The metrics section gives a real-time and historical view over key instance statistics such as memory and CPU load which helps you spot if an instance type is suitable for the load it is currently dealing with.
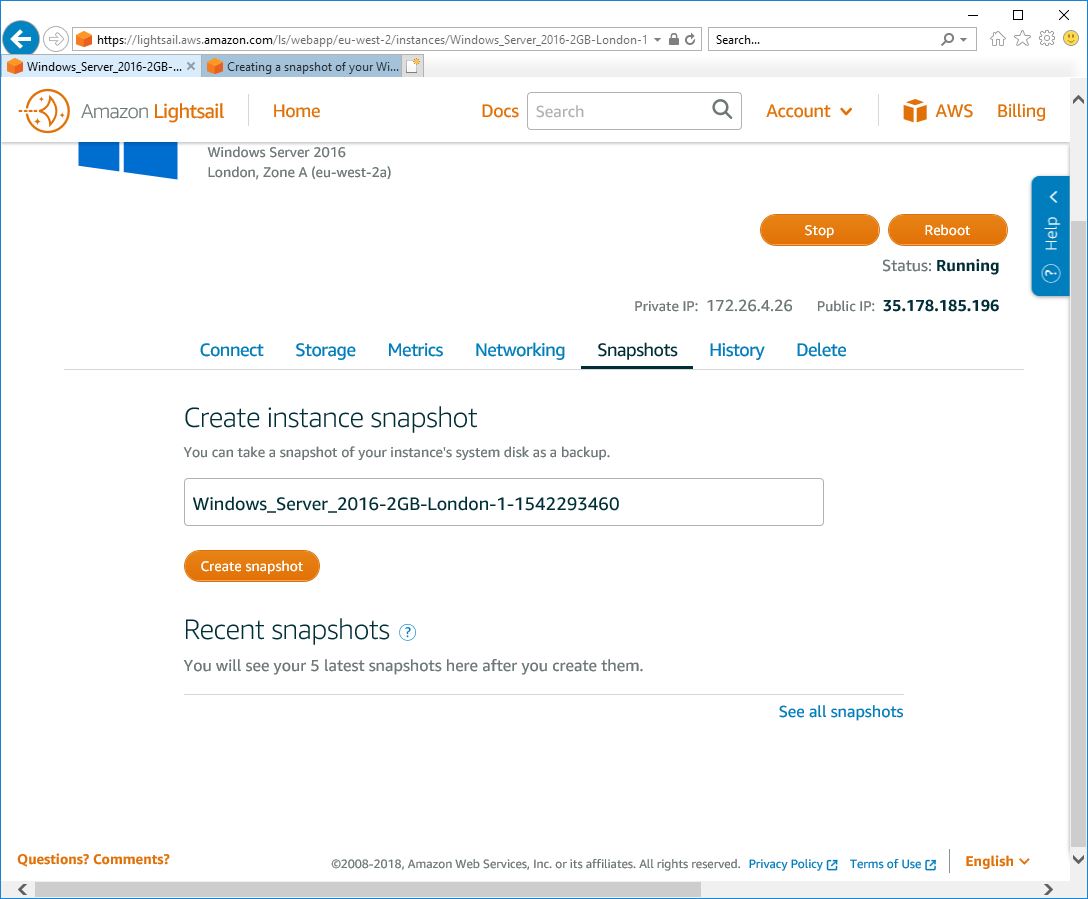
Backup Options
The snapshot tab can be used to take manual snapshots of the instance to allow for restorations to either revert an instance to a known point in time or indeed duplicate an instance.
In order to snapshot the instance, it is recommended that it should be prepared and stopped first.
This can be useful for disaster recovery scenarios, but for file-based backup, we recommend you install a 3rd party backup tool within the instance such as BackupAssist and take regular backups of the unique server data. For example for a server running MDaemon it would be ideal to use the BackupAssist Standalone cloud Backup licence to run daily backups of the MDaemon directory structure to a specific Amazon S3 bucket, This would allow for a secure, super fast and low cost backup that could easily keep 30 days or more retention.
Tighten up security by using multifactor authentication
Now that you have a root account setup it’s good practice to add protection to that account by turning on MultiFactor Authentication.
This option will require you to add a one time token every time you log into the website.
This can either be a text sent to your mobile phone or you can use a token Authentication app like ‘Google Authenticator’
For more details on how to enable MFA on the root account see:
https://docs.aws.amazon.com/IAM/latest/UserGuide/id_credentials_mfa_enable_virtual.html
Congrats, that’s it!
Your server is now ready for your data and applications.
Need help with it?
If you’re using one of the products we distribute and you have up to date upgrade protection, you’re welcome to give us a call and we’ll gladly give you a steer in the right direction regarding migration.
We can’t support any applications not purchased from us.