05 Feb How to protect your domain reputation using DKIM
One of the most overlooked areas of email security is your own domain reputation. Unlike most email security solutions, Reputation is focused on you as the sender’s ability to send email to recipients and to stop spammers from spoofing you and claiming to send email as your domain.
There are several techniques that can help give your outbound email sessions ‘good reputation’ one of which is SPF, but in this blog post Let me introduce Domain Keys Identified Mail of ‘DKIM’ for short.
So what is DKIM
DKIM is a method used to sign all email as it leaves an email server by adding a digital signature to the message. This signature is computed from the actual message headers, message body as well as a Private Key only know by your Mail server and is therefore unique for each message sent. The server knows the private key, but this is part of a public/private key pair, the public part as the name suggests, is made freely available for recipient servers to use.
It’s worth noting the message itself is not encrypted by DKIM, just digitally signed.
When a receiving server detects the presence of a DKIM signature, it looks up the public key for that domain that is stored in the Public Domain records for the sender’s domain.
The receiving server can then use this public key to verify if the signature is valid for the email received.
This verification does two distinct things.
- It tells the receiving server that the email has been sent by a server that has the private key and is therefore allowed to sign the message. A spoofing server would not know the private key and could not spoof this.
- It verifies that the message has not been changed in transit by a relay server. what is received is exactly what was sent. If anything in the message changes the Signature would no longer be valid for that message.
DKIM is now widely utilised by all the major email delivery platforms and widely trusted method to help verify email sources. As a result, you may notice that email recipients consider your domain a possible spamming domain if you do not have a valid DKIM record configured.
If you are not currently using it on your own domain we highly recommend you configure it.
So how do I configure DKIM on my MDaemon server?
There are two distinct steps that need to be looked at when setting up DKIM.
Create unique public and private Keys
Luckily MDaemon makes this process easy and does all the hard work for you.
The first stage is to select the ‘Create a new public and private key pair‘ button within MDaemon. This option can be found under Security Manager > Sender Authentication > DKIM Signing…
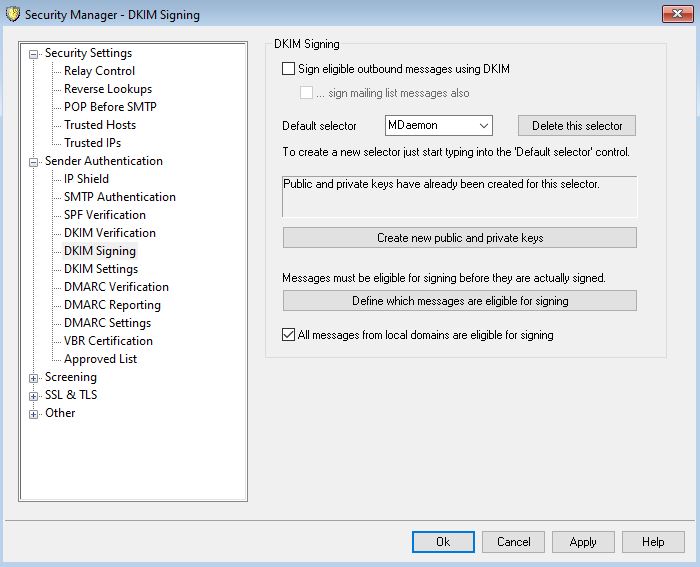
By clicking the button you are presented with a text file with all the information you need..
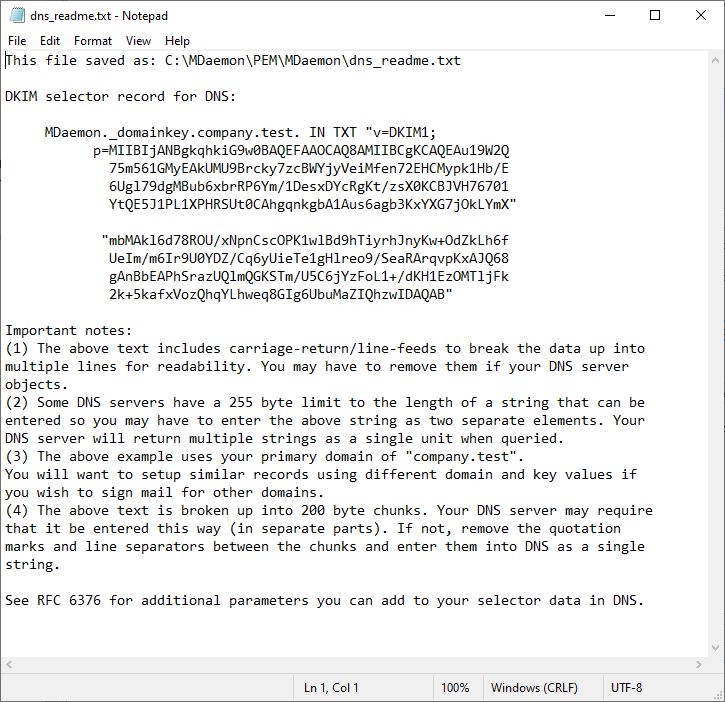
In this example, the server’s domain is simply ‘company.test’ and in order for DKIM to work, I need to create a new ‘TXT’ DNS records for the domain.
The TXT record is named. “MDaemon._domainkey” and needs to contain the unique signature text…
“v=DKIM1;
p=MIIBIjANBgkqhkiG9w0BAQEFAAOCAQ8AMIIBCgKCAQEAu19W2Q
75m561GMyEAkUMU9Brcky7zcBWYjyVeiMfen72EHCMypk1Hb/E
6Ugl79dgMBub6xbrRP6Ym/1DesxDYcRgKt/zsX0KCBJVH76701
YtQE5J1PL1XPHRSUt0CAhgqnkgbA1Aus6agb3KxYXG7jOkLYmX”
“mbMAkl6d78ROU/xNpnCscOPK1wlBd9hTiyrhJnyKw+OdZkLh6f
UeIm/m6Ir9U0YDZ/Cq6yUieTe1gHlreo9/SeaRArqvpKxAJQ68
gAnBbEAPhSrazUQlmQGKSTm/U5C6jYzFoL1+/dKH1EzOMTljFk
2k+5kafxVozQhqYLhweq8GIg6UbuMaZIQhzwIDAQAB”
Now this is where it can get a little tricky depending on the DNS provider you use as this text record is larger than the 256 character limit that many providers have on the DNS control panel they provide.
This is explained in the dns_readme.txt file MDaemon generates and you will see this show the key as two blocks of text. This is to enable you to cut and paste them into your DNS provider individually to create a larger single record if needed.
Adding the DNS records to your domain
Exactly the process to change DNS records depends on the DNS hosting provider you use to manage your domain but in our experience, the longer DKIM records that Mdaemon generates are not supported by many DNS providers web interface and typically you will need to contact their support email with the information in the text file.
Creation of DNS records can take 24 hours or longer depending on when the DNS provider actions your request but you can check them using the following Windows Command
nslookup -type=txt mdaemon._domainkey.company.test
(Change the domain to match your own)
Option to use shorter keys
If you are having issues getting the longer DKIM records created configured with your DNS Provider you can instruct MDaemon to create shorter keys by editing the MDaemon.ini file and adding the following line under the [DomainKeys] section…
[DomainKeys]
KeyBitSize=1024
Then in MDaemon under the DKIM Signing option select the option to ‘Create new public and private keys‘ again

This will generate a new dns_readme.txt file with a shorter key like this…
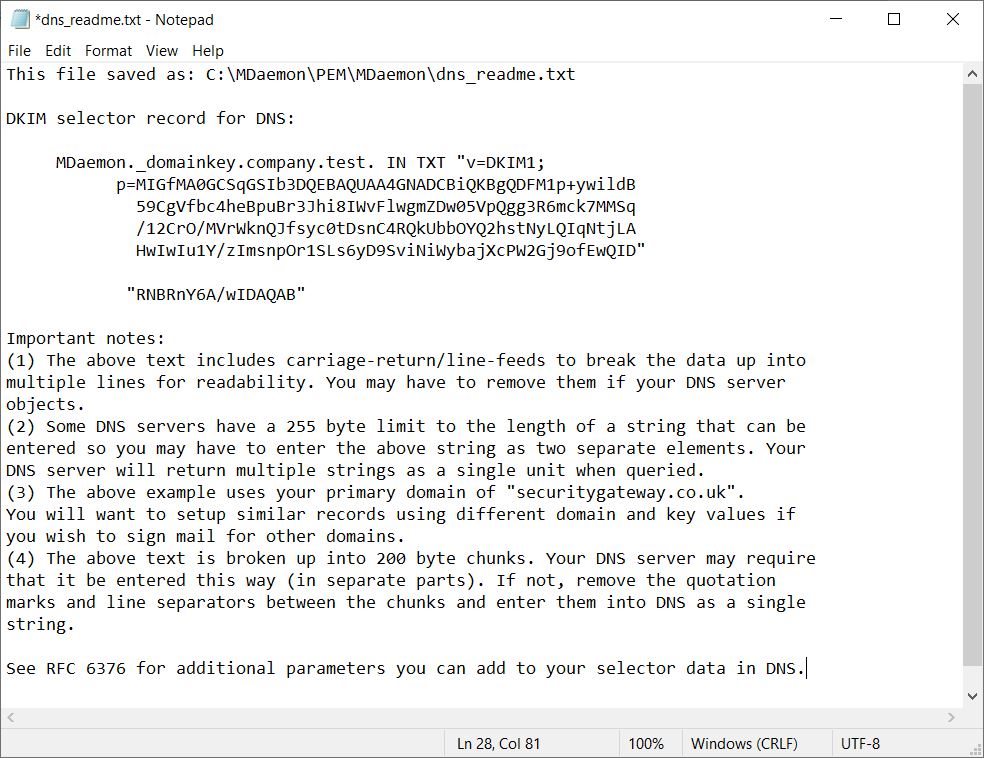
The key is still broken up into two blocks that include additional spaces, we suggest you copy the text and remove all the spaces and aditional quotes to leave just a single string for example…
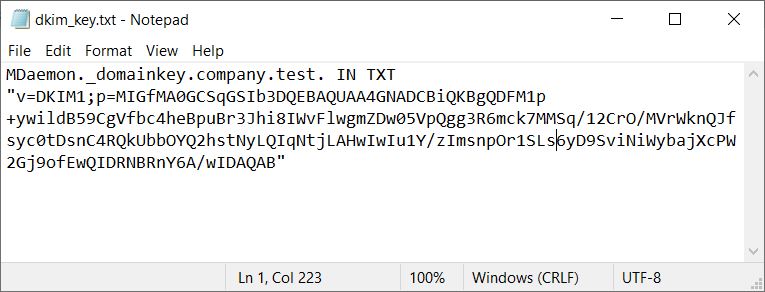
(shown with wordwrap enabled in notepad)
This shorter key can then be added as a txt record within the DNS providers Control panel in a simular way to this…
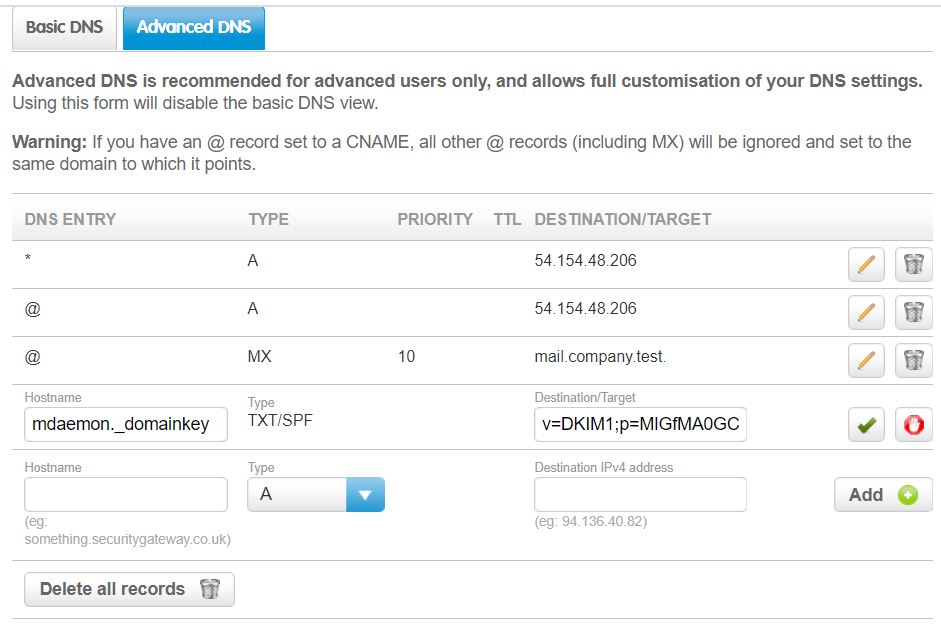
Don’t forget to check the Key looks correct using the NSlookup command
nslookup -type=txt mdaemon._domainkey.company.test
(Change the domain to match your own)
Signing new email
Once you are happy the DKIM Record is correct you can enable the option to sign messages within MDaemon.
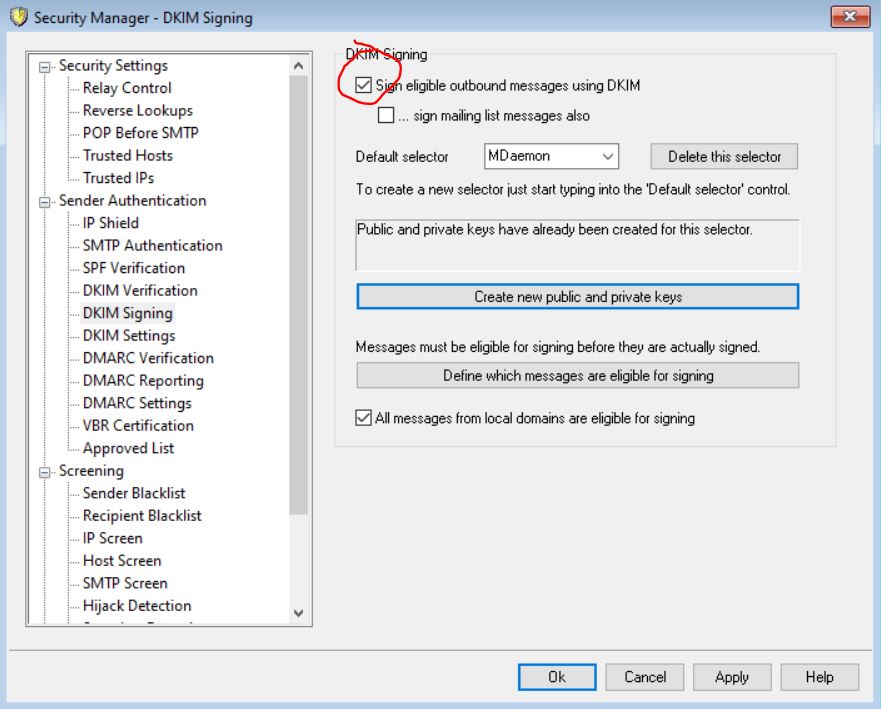
Don’t enable this option until the DKIM record has had time to propagate through DNS or you risk your emails not being accepted.
Enabling DKIM signing for other domains
Once you’re happy that you’re successfully DKIM signing outbound messages for your primary domain name, you will probably want to do the same for any additional domains you have in MDaemon.
In MDaemon go to, Security -> Security Settings -> Sender Authentication -> DKIM Signing
Click the ‘Define which messages are eligible for signing’ button and add an entry as shown below:-
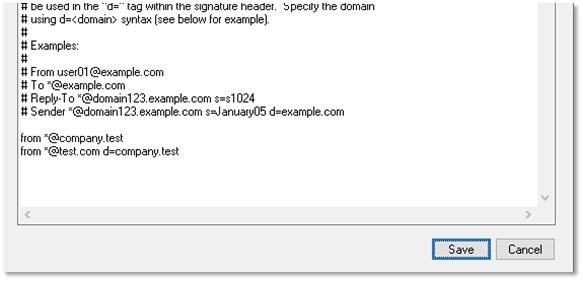
In the example shown above, ‘company.test’ is my default domain that has already been set-up and I’m adding an entry for the ‘test.com’ domain so that all emails from that domain will also be signed using the same DKIM key.
The ‘d=company.test’ part tells other servers to do their DKIM verification using the public key already added to the DNS records for the ‘company.test’ domain.
This means that I only need to publish a single public DKIM key for all the domains I need to sign for which is the simplest option.
Keep a backup of your public/private keys
You will want to retain a backup of the public and private DKIM key pairs that you generated earlier. When you generated these, a copy was stored on your server in the ‘..\MDaemon\PEM\MDaemon\’ folder. The ‘MDaemon’ part here is known as the DKIM ‘selector’ which is what MDaemon defaults to using.
Note that once you’ve generated your keys and published the public part to your domain’s DNS, you should make sure not to generate and overwrite the new ones which is what will happen if you click the ‘Create new public and private keys’ button again. If you do accidentally do this, you will either need to restore the backed-up information or, failing that, disable the DKIM signing or outbound emails before running through the above steps from fresh.
Adding a DMARC Record
Once you have both a valid SPF record and are successfully signing using DKIM, you can create a DMARC record to further help with your email reputation.
The DMARC should be named
_dmarc.company.test
and in its simplest form would contain the text
“v=DMARC1; p=quarantine”
This instructs the remote server to quarantine any email that fail both SPF and DKIM checks

