19 Dec Migrating users mailboxes from any ActiveSync server over to MDaemon
One of the biggest concerns when changing email platform is how can you migrate all your users existing email, calendar and contacts data over without having to ask each user to backup and restore there own data via their email client.
In this blog article I want to introduce the ‘MDaemon ActiveSync Migration Client’ that makes the process of moving multiple mailboxes from any other ActiveSync capable server over to MDaemon a much easier task.
ActiveSync is a fully supported email protocol for many email platforms including Microsoft Exchange, Office 365 and Kerio Connect, but any ActiveSync capable server that supports the recent protocols should also work without issue.
So what is the ‘MDaemon ActiveSync Migration Client’?
The MDaemon ActiveSync Migration Client (asmc.exe) is a command line tool that you will find within the MDaemon ‘APP’ folder. This tool can be run from the Windows command line with a set of arguments and as the name suggests works as an ActiveSync client to connect to an existing ActiveSync server where it will login using a users existing credentials and synchronise the contents of that mailbox. For each user mailbox it collects from, it converts this data into the correct file format for MDaemon, where it generates an MDaemon user folder fully populated with that users data.
Rather than running the command for each user at a time, the MDaemon ActiveSync Migration Client works by passing it an input CSV file that contains a list of accounts that need to be synchronised. This includes the server address to connect to, the username and the password. Therefore, before you begin, the first step is to put this CSV file together. If this is the first time you have run the tool you can start with just one account to test and then re run the common against a much bigger list once you are happy the process has worked as expected.
Step 1 creating your source CSV file of users.
I would recommend that you begin by creating a new folder within your MDaemon installation folder to store the input file as well as a log file that will be generated later. This will make it easier to find when we use the command. On a default installation create the folder C:\MDaemon\ASMC-files\ (If your installation of MDaemon is on a different drive change the path accordingly).
Once created, open this folder in Windows File Manager and create a new text file called ‘input.csv’ and open this file within notepad.
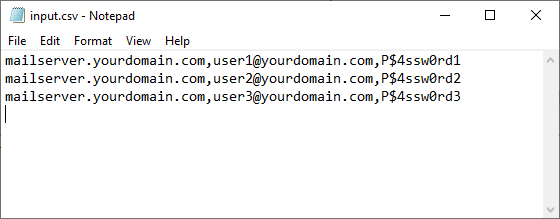
As shown above, the format of this CSV file is the Server Name of current ActiveSync server followed by the username for the account then finally the password for the same account – all separated by a commas.
The server name can be a Host Name or IP Address and be either local or public so depending on the server you are connecting to these details may look different. Usernames are typically the full email address. The domain part of the email address is used to create the domain within the MDaemon users folder.
Office365 Example:
outlook.office365.com,user1@mydomain.com,P$ssw0rd01
Local (onsite) Exchange Example:
EXCH-SRV01,user1@mydomain.com,P$ssw0rd01
A word of warning! If you edit this file with Microsoft Excel, double check the file afterwards in notepad. Sometimes Excel will put quotes around each field. This will not work with the MDaemon ActiveSync Migration Client tool and these will need to be removed. The format must look exactly like the examples above.
We can re-run the command later and simply by editing the contents of this file we can control which mailboxes are synchronised.
Step 2 Using the ASMC.exe at the command line.
In order to run the MDaemon ActiveSync Migration Client tool we need to open a Windows Command line as an administrator. On most versions of Windows the best way to do this is to click on the Windows Start button, type ‘cmd’ and when the cmd icon appears, right click on it to “Run as Administrator”:
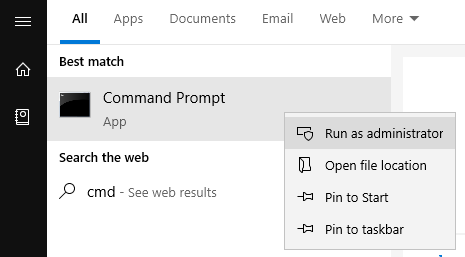
Important! You must run an elevated command prompt like this as the ASMC.exe tool will not work correctly under a regular command line.
Once you have opened the command prompt we need to navigate to the MDaemon App folder as follows:
cd C:\MDaemon\App
(change this to match the path of your MDaemon ‘App’ folder)
If you would like to see all the options on the ASMC.exe file you can simply type asmc /help
For most scenarios the command we are going to use is…
ASMC.exe /InputFile:C:\MDaemon\ASMC-files\input.csv /LogFile:C:\MDaemon\ASMC-files\logfile.txt /Outdir:C:\MDaemon\Users /ImportFile:C:\MDaemon\ASMC-files\UserImport.csv /SSL /Ice /resync /IgnoreGetUserInfoErrors
Let me explain what is going on here:
/InputFile:C:\MDaemon\ASMC-files\input.csv
This is the path to the source input file that contains our users
/LogFile:C:\MDaemon\ASMC-files\logfile.txt
This is the path to the log file to create that will help if we have any issues with specific users mailboxes
/Outdir:C:\MDaemon\Users
This is the path to the MDaemon users folder, this is where new domains and users mailboxes will be created and can be linked to MDaemon accounts at the next step
/ImportFile:C:\MDaemon\ASMC-files\UserImport.csv
This will create a new CSV file that we can use at the next step to import the users account details into MDaemon (at this stage we are only creating the mailbox data).
/SSL
Connect using SSL ( HTTPS)
/Ice
ignore any SSL errors
/resync
The Resync option will re synchronise data in the destination folder so should you re-run the command, the mailboxes will be updated with changes. This is useful if you are running the command more than once to ‘update’ the MDaemon folder structure.
/IgnoreGetUserInfoErrors
We have found this option is needed when connecting to Kerio Connect ActiveSync servers. It can be removed for Exchange or Office365 accounts.
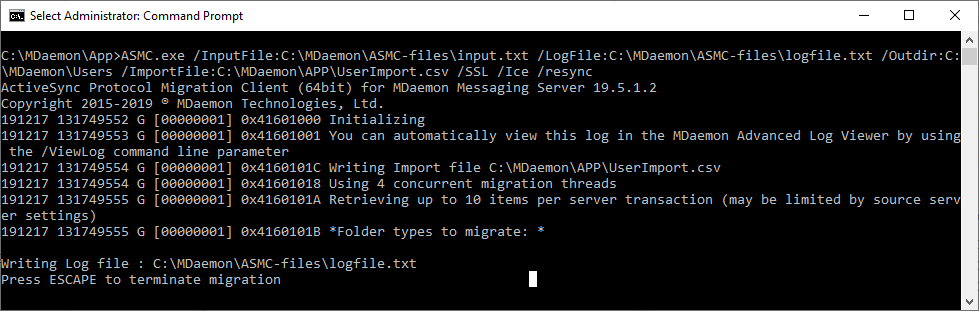
When you run the command you will see the command show its progress and for large mailboxes this can take some time to complete! I would recommend you test one average sized account to check how long that took and see how much data was transferred. This will give you an idea of how long it will take to migrate multiple mailboxes.
Once you are happy with the process , update your input.csv file and rerun the command.
You should now see that a domain folder has been created under the MDaemon
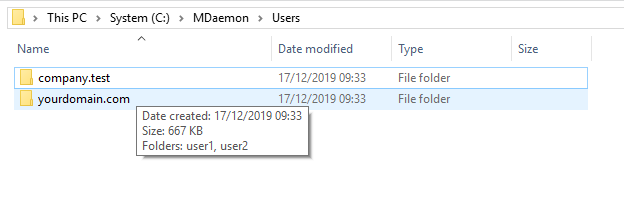
Step 3 Import the users account details into MDaemon to link accounts to the migrated mailbox data
Once all your account data has been collected and your MDaemon users folders have been created, the final step is to import the users account details (name, email address password, etc) into MDaemon using the C:\MDaemon\ASMC-files\UserImport.csv file that you created in Step 2.
To do this open the MDaemon GUI and navigate to Accounts -> Importing -> Import accounts from a comma delimited text file…
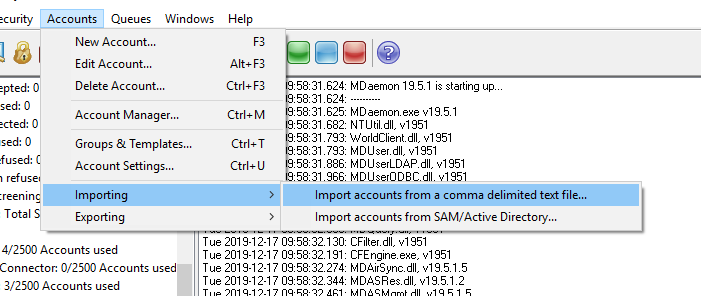
Once imported you should see your users added to MDaemon and they will be linked to the relevant mailbox data you imported in step 2.
When Migrating many users with large mailboxes this whole process may take many hours to complete, which is why we recommend testing with a small number of accounts to start with and the repeating with the remaining accounts.