29 May Migrating your auto-complete history to a new Outlook profile
 If you’ve ever needed to recreate your Outlook profile, or have migrated to a new PC, you may have noticed you’ll lose your auto-complete information that Outlook keeps when you send a message to a recipient email address.
It’s probably not something you’d notice straight away but inevitably it becomes a little frustrating that those addresses you frequently send to aren’t appearing in the pop-up suggestion window.
Thankfully this data is stored locally on your machine, and with a little forethought can be migrated to your new profile. Here is what you need to do:
IMPORTANT: Make sure you exit Outlook before starting the following procedure. The names will be included in auto-complete when you restart Outlook.
For Outlook 2003 and 2007:
1. On the computer with the saved auto-complete names,
- On an XP machine, open:
C:\Documents and Settings\user name\Application Data\Microsoft\Outlook - On a Windows 7 or later machine, open:
C:\Users\username\AppData\Roaming\Microsoft\Outlook
NOTE: Depending on your file settings, this folder might be hidden. To view the files in this folder…
- Click Start, and then click My Computer.
- On the Tools menu, click Folder Options.
- Click the View tab, and then, under Advanced settings, under Hidden files and folders, click Show hidden files and folders.
2. Take a copy of the profile name.nk2 file. You will need this in the profile on the computer you are migrating to.
3. On the computer where you want to populate the auto-complete feature, copy the file to drive:\Documents and Settings\user name\Application Data\Microsoft\Outlook.
4. If the Outlook user profile name is different on the computer where you are moving the .nk2 file to, you must rename the file with the same Outlook user profile name after you copy it to the correct folder.
5. If you’re creating a new profile on the same machine, you will want to rename the .nk2 file that was created for your new profile and then rename the imported .nk2 file to the new profile name.
6. If prompted about replacing the existing file, click Yes.
7. Open Outlook to view changes.
For Outlook 2010, 2013 and 2016
1. Open the start menu and type in:
C:\Users\%username%\AppData\Local\Microsoft\Outlook\RoamCache
This will open the Outlook cache folder which contains many files..
2. The autocomplete files start with Stream_Autocomplete and end in .dat
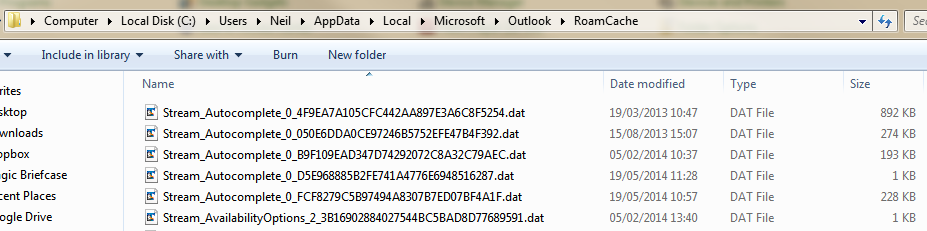
There may be multiple files but the one with the most recent date should be the current one used by the last Outlook profile you created.
In my example above you can see that I created a new Outlook Profile at 11:28 on the 19th April. But my previous Outlook profile was last updated at 10:57 on the same day. The size of the files also gives you a clue to the fact that the latest one is empty.
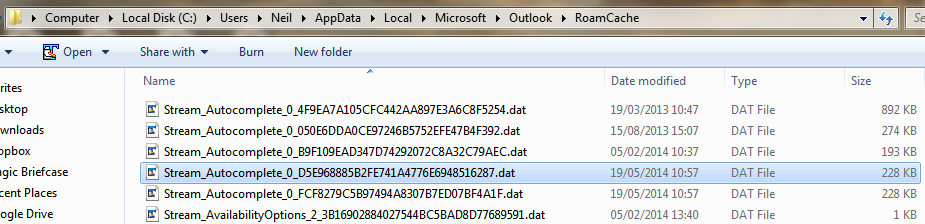
3. With Outlook closed (very important), copy the full file name of the current (empty) Auto Complete file. You may want to copy this file name into Notepad. Now delete the file. Copy the slightly older file that contains the auto-complete data you need. Finally rename this copy to the file name you just copied ( which is in notepad).
You should now have the same files as before but the current auto-complete file should be a copy of the last working one and share the modified date and time…
Now when you start-up Outlook with the new profile it should find all the relevant auto-complete data.
Hope you found that useful! Feel free to let me know how you get on in the comments section below.
– – – – – – – – – – – – – – – – – – – – – – – – – – – – – – – – – – – – – – – – – – – – – – – – – – – – – – – –
![]() Try any of our software completely free for 30-days:
Try any of our software completely free for 30-days:
MDaemon email server | BackupAssist | MailStore email archiver