There are a few reasons why a business may have multiple Internet connections into a building. With some of the most common situations being…
- They may be that they are in a poor Broadband service area and can only receive a slower connection and have chosen to purchase two or more connections to help improve the experience to users
- They need a high available Internet Connection and have purchased a Internet connection to ask as a backup to a primary connection ( often Broadband backing up a leased Circuit)
- They want to split different services over different dedicated connections, for example they have a dedicated Internet connection for Specific traffic like Email or VoIP
- They are testing out a new Internet connection and want to keep an existing service operational while they gain confidence in it. For example moving to a 5G or Satellite service
Whatever the reason generally a mixture of 3 separate technical features are required to build a reliable and efficient solution…
- Wan Failover :- Where one or more Internet connections are connected to a single router and if one or more fails the traffic automatically switches to the remaining available connections
- Wan Balancing :- where traffic is shared between multiple Internet connections either distributed proportionately or by selecting different connections for specific traffic.
- BandWidth Control / Quality Of Service:- shaping and prioritising traffic so that high priority traffic can be guarantied the best service, and low priority traffic can either be limited or heavily restricted.
In this guide we will look at these three features of the Untangle Firewall in more depth and see some of the detailed options available
Wan Failover
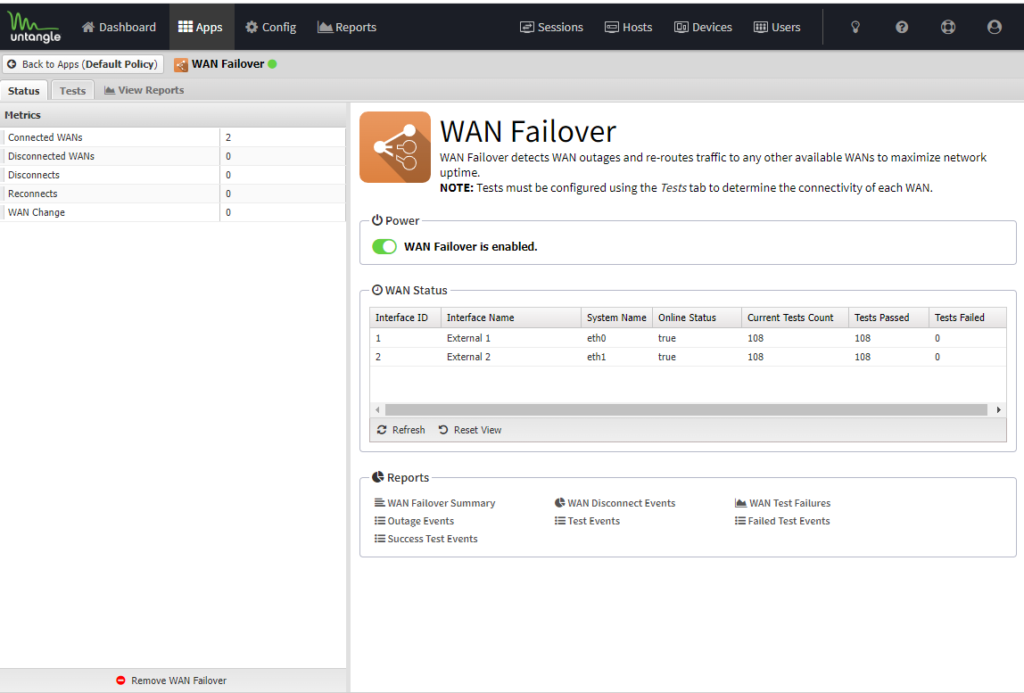
In Its simplest for this simple feature allows for a WAN connection to take over should the main WAN connection fail for some reason. The main focus of the WAN Failover is to provide a detection method to determine if a WAN port is no longer working correctly and should be effectively unused for Internet traffic until it returns. This is done through the use of regular ‘Tests’ on the WAN Interface.
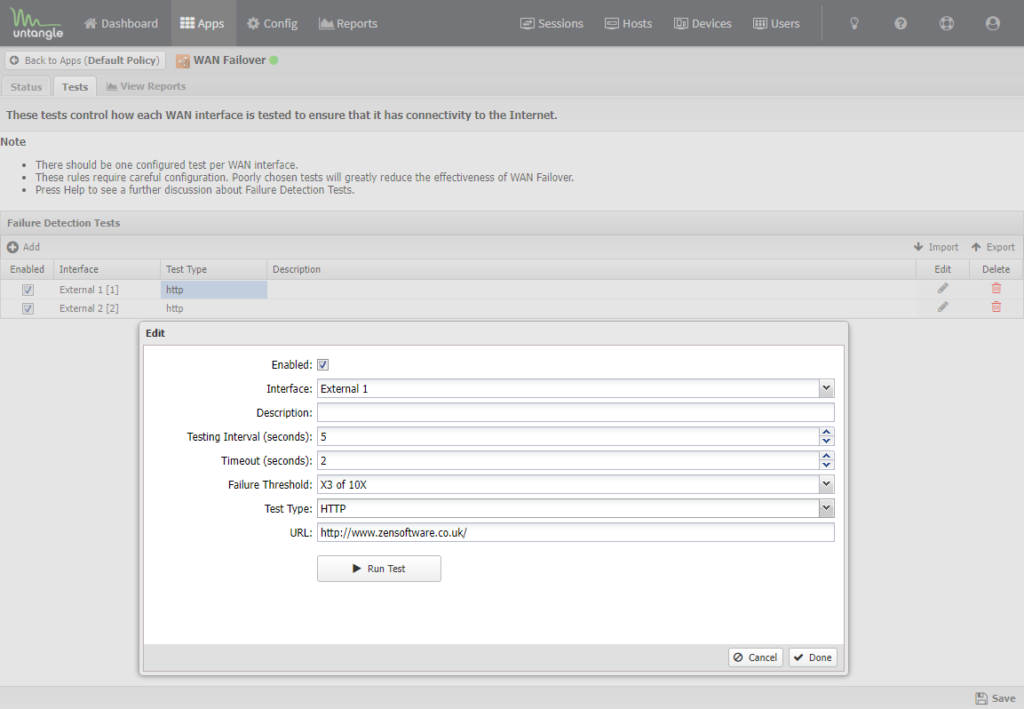
There are four types of tests available, ARP, PING,DNS and HTTP. Typically a PING check of an upstream host is considered enough to determine if a Internet Connection is present, but does not actually confirm it can be used for Web Traffic. so we prefer to use the HTTP check to check that a known server is alive and able to server web traffic to the firewall over that WAN interface. However you are relying on that server to be available 100% of the time. which has to be considered when choosing this option.
Along with the testing Interval and timeout of a test there is a failure threshold that allows for some intermittent packet loss before triggering a failure. So in our example we have chosen to trigger is more than 3 in 10 checks fail. This minimised false negatives but also stops bouncing Interfaces due to potential packet loss issues.
You can configure tests on as many WAN interfaces that you have in the system and this will automatically manage them for you, but you should only configure a single test for each WAN Interface, If you configure multiple tests per interface and any test fails the WAN Interface will become disabled.
Wan Balancing
Where Wan Failover is focused on temporally disabling a WAN port if it is unavailable, on its own this can only work in Active/Passive scenario, there is a Primary WAN port and if its unavailable a secondary WAN port takes over. If the Primary WAN Port is up and working no traffic will use the secondary WAN Port and it will sit idle.
This is a bit of a waste of potential resources and and instead why not make use of both of the Internet connections all the time?
This is where WAN Balancing comes into play.
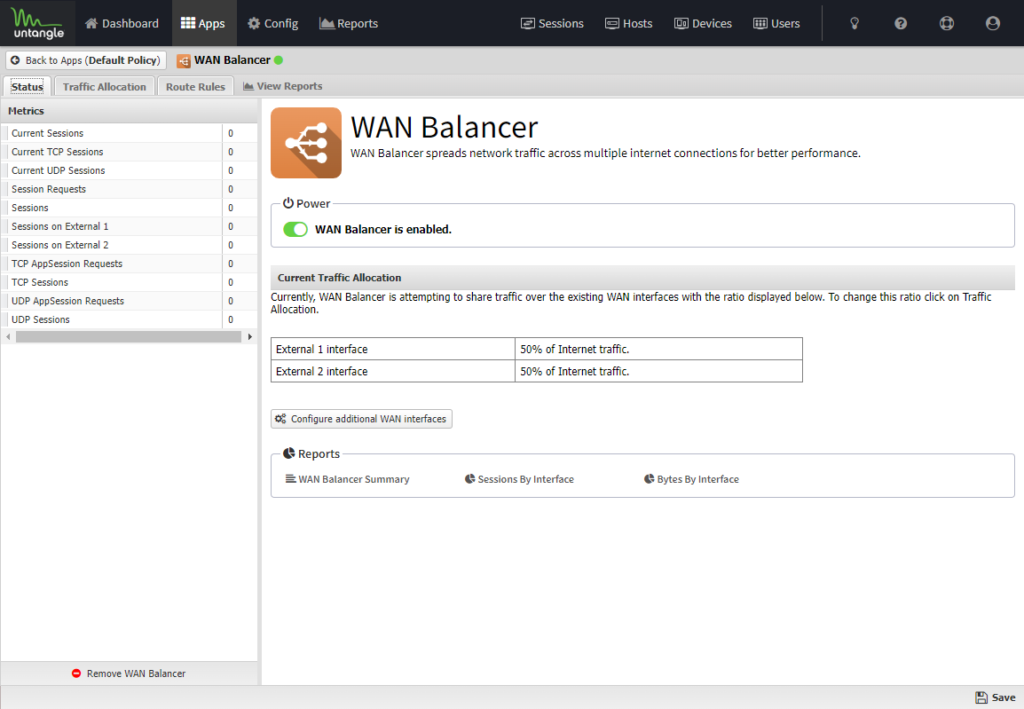
The first thing to think about when Balancing WAN ports is the available bandwidth on each WAN port. In some cases this may be the same for each PORT or it could be very different.
This is managed through the ‘ Traffic Allocation’ Section where you can configure a ‘Weighting’ for each WAN Port
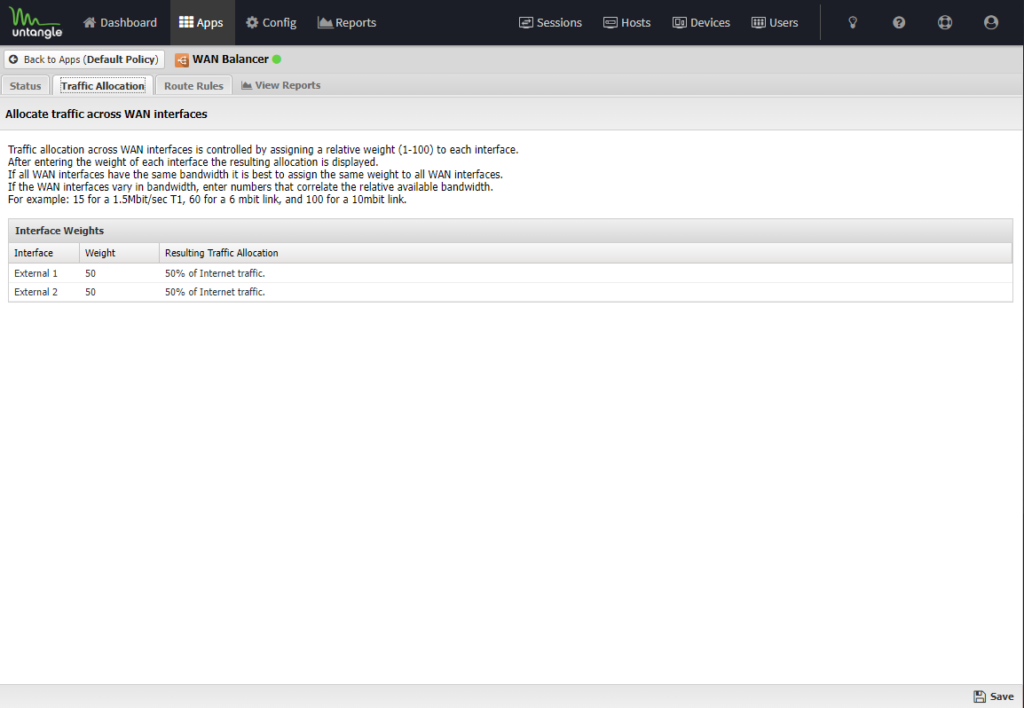
This can be a simple 50/50 split if the Ports have similar bandwidth capabilities, or you can weight them differently if your WAN Internet connections have different Download capabilities. For example. lets say you have two Broadband lines and one is capable of 36mbps downstream, but the other only 22mbps. you could weight the ports using the values 36 and 22…
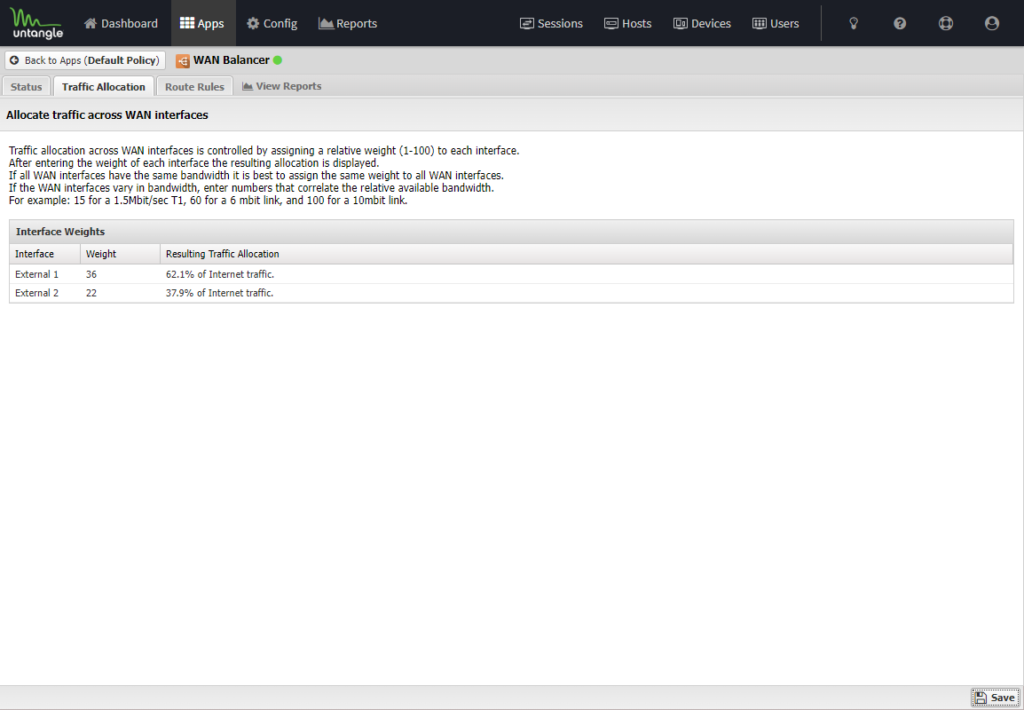
This would calculate the resulting traffic allocation automatically, so no need to work that out manually 🙂
In these examples we are using just two WAN ports but this is not limited and you can add multiple WAN ports if available and spread the load further.
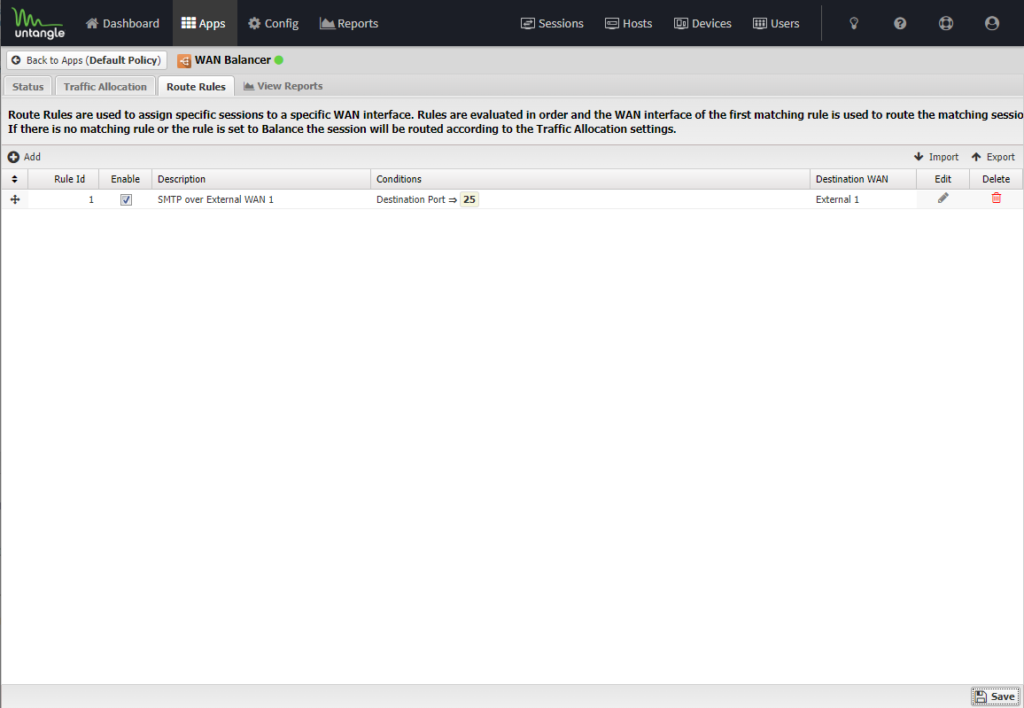
In addition to overall traffic balancing you can also force traffic down specific WAN ports if required, This might be due to the need to fix the sending WAN IP used or to steer specific traffic types down specific Internet connections. For example say you want to have all SMTP traffic leave your network over the Wan Port ‘External 1’ you can create a Route Rule to do this.
Bandwidth Control
Having balanced your WAN ports your users can continue to utilise the Internet with no further traffic shaping, But often the next area of control to look at is Bandwidth Control. Not all Internet traffic is equal and as we all know it only takes one Bandwidth hog to effect the experience of other users Internet access, and business critical traffic may be delayed as a result.
By categorising and prioritising internet traffic types you can guarantee that the most critical traffic always gets through and less important traffic is pushed to the bottom of the list.
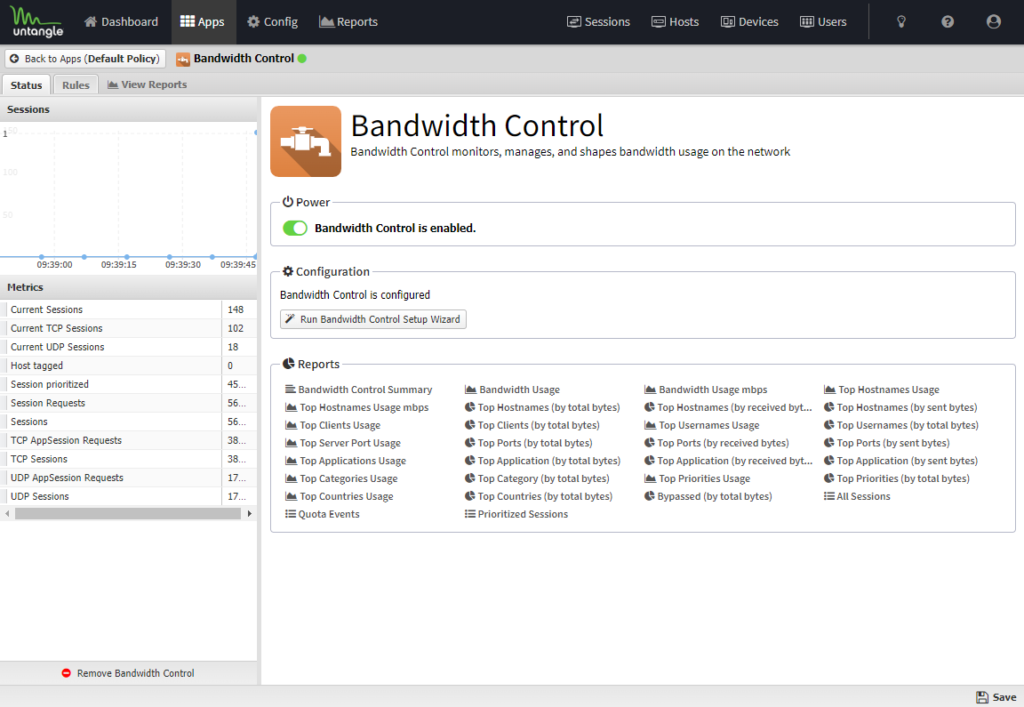
When you first run the Bandwidth Control app the first thing you should do it run the ‘Bandwidth Control Setup Wizard’
The First thing you need to do is define the Download and Upload Bandwidth available on each WAN port
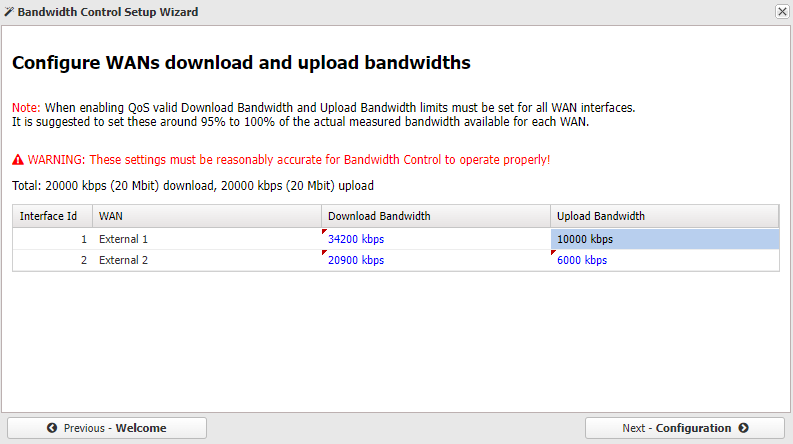
As the guide suggests this should be set at about 95% of the theoretical available bandwidth. so in our example above we use figures such as the above, but feel free to experiment here a little, and consider looking at the untangle interface traffic graphs under 100% utilisation to get a feel for the real world available bandwidth.

You can then choose a configuration template from a set of typical scenarios. to bui8ld a set of rules from ,you can customise these later or re-run the wizard if needed.
You can optionally configure User Quotas if you like to limit users access further. For example to heavily restrict or block user access when they reach a daily quota of traffic.
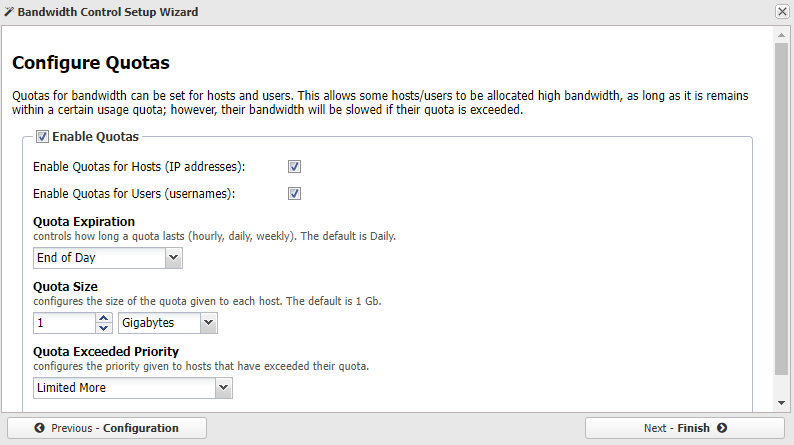
After Finalising the Wizard, a set of example Rules will be created for exmaple..
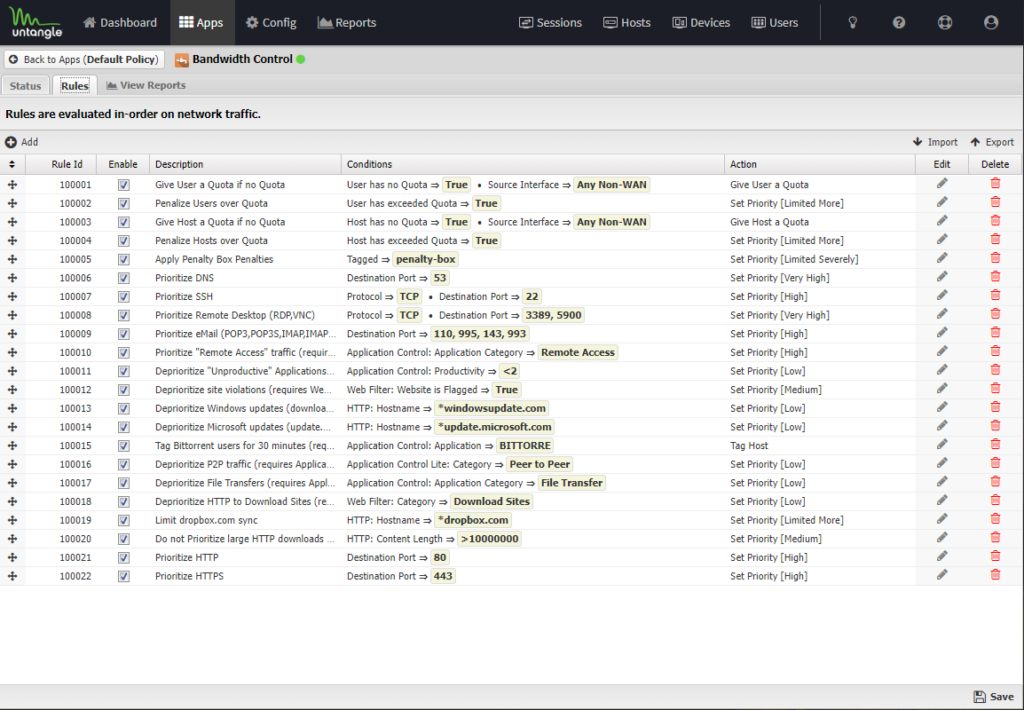
Often these are suitable ‘as-is’ but you can use them as examples to further define your own rules as needed to further prioritize or restrict specific types of traffic. for example yuo can copy the ‘Deprioritize HTTP to Download Sites (requires Web Filter)’ rule to do a simular thing with Social Networking sites by creating the rule…
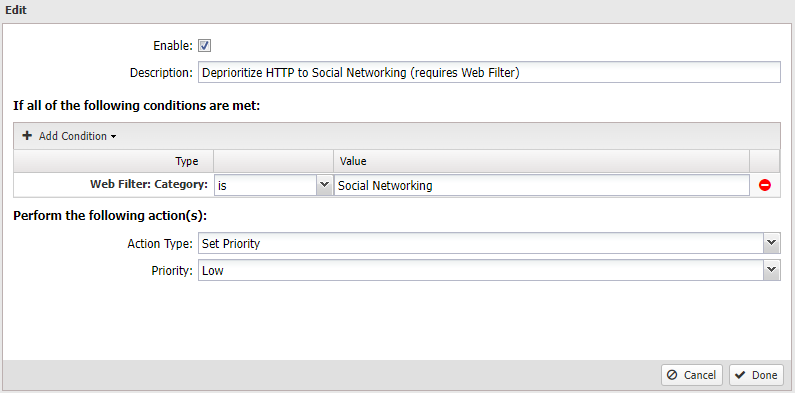
There really is a wealth of options here for matching and controlling traffic based on web filter category, source/destination IP or ports, even Usernames or Groups of users.
The Action priority levels are further defined under Config > Network > Advanced >QOS > QOS Priorites
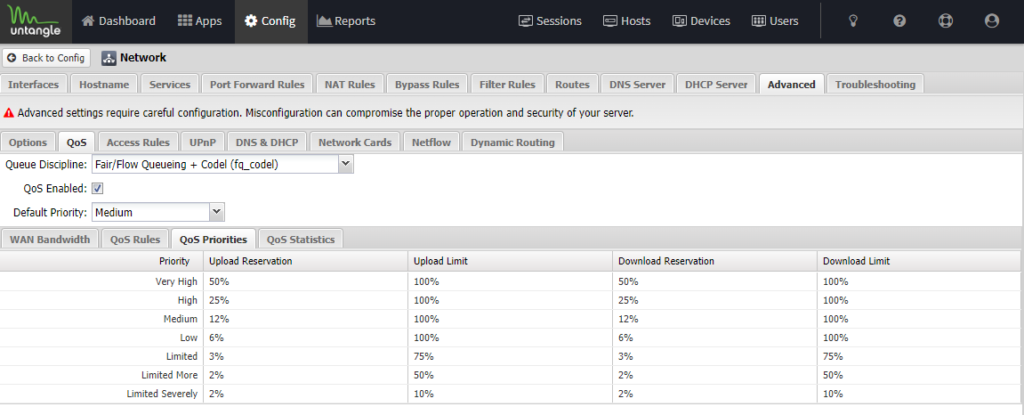
So for each level you can define a upload and download reservation or hard limit. Generally you can leave these as default but you may wish to have finer control here.


