This article will explain how to setup a offsite archive of an MDaemon server data by utilising the BackupAssist Rsync Engine and a Remote NAS device that supports the Rsync Protocol.
There are many different NAS devices on the market of which a lot will support Rsync. However, the ease of setup of these devices can vary dramatically and so for this reason we recommend you choose a device that has been tested to work with BackupAssist.
Choosing a NAS device
The main consideration when setting up a NAS device is whether is supports the Rsync over SSH feature.
SSH allows the Rsync data to be encrypted across the internet and is a better option for security. However, this is not the only reason for using it. When BackupAssist uses an SSH capable Rsync NAS device it can utilise the Single Instance Store function on the NAS. This allows it to reduce the storage requirements dramatically as only one copy of any file needs to be stored on the NAS, only new and changed files take up extra space. In practice this can mean that a 7 day archive of 30GB of MDaemon data may only take for example 40GB of storage. Without SSH this job may take up 210GB of Data.
Configuring the NAS server
For this example, we will be using a QNAP TS-209 NAS device. You may find that other devices in the QNAP range are configured in the same way.
This setup guide begins with a QNAP TS-209 with factory default settings.
1. Begin by setting up your NAS as per the ‘Out-of-the-box’ instructions. This includes adding disks, powering the device up and connecting it to your network.
2. Insert the setup disk into a workstation on the same network as the QNAP, install and run the QNAP Finder.
3. Once QNAP finder has located your QNAP click on the entry in the table, then click ‘configure’ (see below). This will begin the QNAP setup wizard that will guide you through setting up the device. During the wizard, you will be required to change the admin account password as well as set up the network interface.
It is important during these steps you take note of the password and IP address for the QNAP.

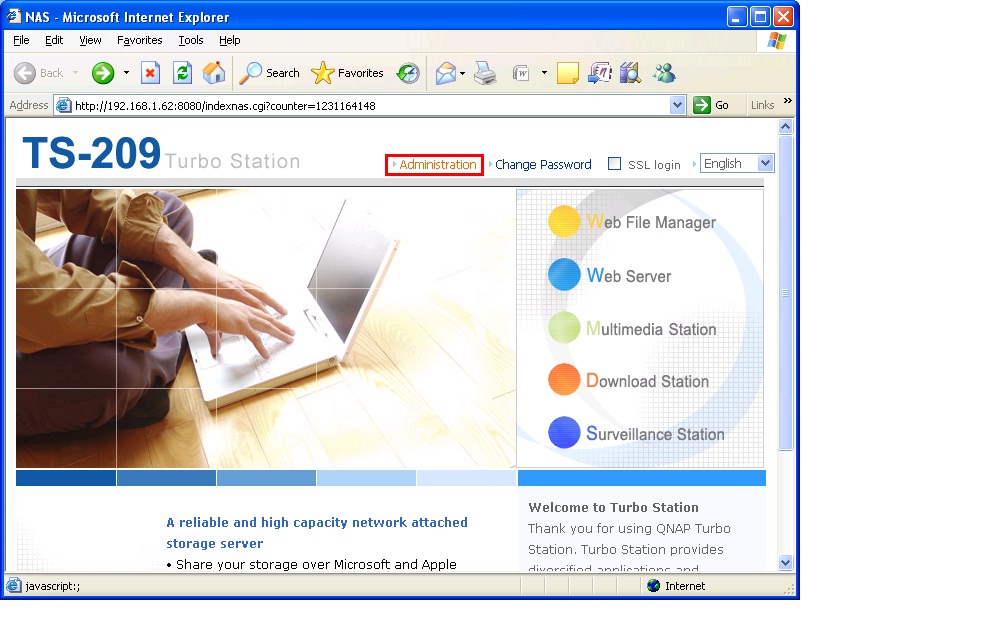
4. After you complete the setup wizard your default internet browser will be launched and the below page will load. Click “Administration” and enter the administrator account details.
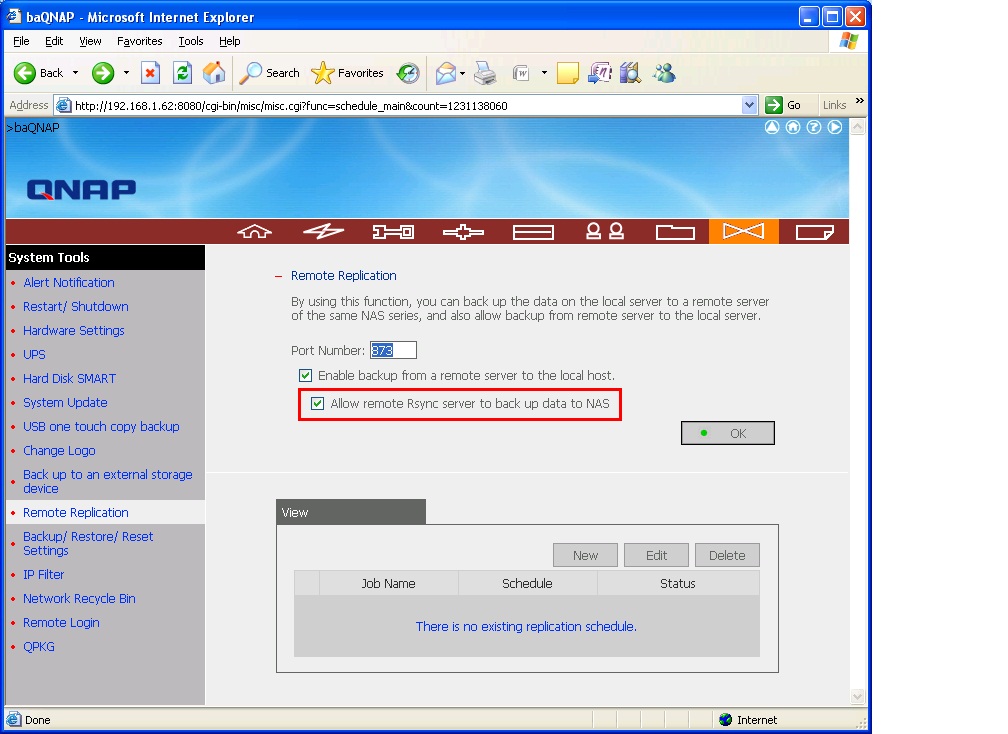
5. Once at the main page, click ‘Remote replication’ under the ‘System Tools’ heading. Once the page loads, check the tick box marked ‘Allow remote Rsync server to back up data to NAS’, then click ‘ok’. Close the window to log out.
Configuring a BackupAssist Rsync Client
In this example we will setup a Backup job to archive the contents of the C:\MDaemon folder to the QNAP NAS device.
1. Open BackupAssist and create a new Rsync backup job.
2. Choose standard ‘Rsync’ not ‘s3Rsync’.
3. Choose the ‘Basic’ schedule and select an appropriate time to update (we will use 22:00).
4. Enter the QNAP IP address and details as shown below. You may want to first run the job on the same network on a local IP address before relocating the NAS to its remote location. You can always change the destination IP address after the job has run once.
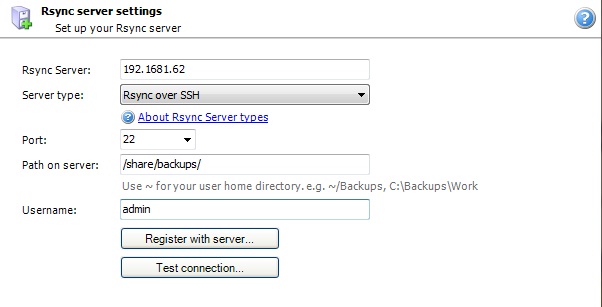
5. Enter the path on the server as /share/backups this will create a new backups folder on the QNAP to store all data.
6. You should click on Register and test connection before continuing.
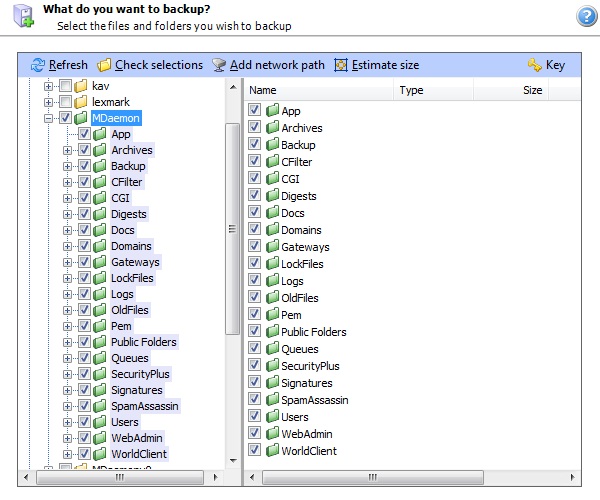
7. Now select all folders within the C:\Mdaemon folder.
8. Name the Job ‘MDaemon offsite archive to QNAP’ and choose Finish.


